Aws Revision


What is AWS?
AWS (Amazon Web Services) is a cloud computing platform by Amazon that provides on-demand IT resources like servers, storage, databases, and more over the internet. You pay only for what you use.
Why do we need AWS?
Cost-Effective: No need to buy expensive hardware; pay only for usage.
Scalable: Easily increase or decrease resources as your needs change.
Global Reach: AWS has data centers worldwide.
Fast Deployment: Launch servers and resources in minutes.
Life Before AWS
Companies bought physical servers.
Needed large data centers to store them.
Paid for maintenance and unused capacity.
Scaling up/down was slow and expensive.
What is an EC2 Instance?
EC2 (Elastic Compute Cloud): A virtual server in AWS.
It lets you run applications without needing physical hardware.
You can choose instance types (CPU, memory, etc.) based on your needs.
Example of EC2 Usage
Imagine you're launching an online store for a seasonal sale.
Before AWS:
You’d need to buy multiple physical servers to handle the traffic during the sale.
After the sale, most of these servers would sit idle, wasting money and space.
Setting up and scaling servers would take weeks or months.
With AWS:
You launch EC2 instances just before the sale, configure them to handle high traffic, and scale up or down as needed during the event.
Once the sale is over, you can shut down the extra EC2 instances to save costs.
Everything is done quickly, efficiently, and at a lower cost.
Why EC2 is Useful?
Flexible Configurations: Choose resources based on your needs.
Pay-as-You-Go: Only pay while your server is running.
Quick Scaling: Add more servers during high traffic.
Simple Analogy
Think of AWS as renting a car instead of buying one.
Before: You’d have to buy a car (physical server), even if you only needed it for a short trip.
Now: With AWS (EC2), you rent the car (server) for as long as you need it.
What is Block Storage?
Block Storage stores data in fixed-sized blocks. These blocks are like bricks in a wall — they hold pieces of data that a system puts together to retrieve full files or applications.
Key Components:
Blocks: Small chunks of data, stored individually.
Volume: A collection of blocks that acts as a hard drive for applications or operating systems.
Snapshots: Backups of a block storage volume.
IOPS (Input/Output Operations Per Second): Measures performance of block storage.
Throughput: Measures how much data can be transferred at a time.
Example : Imagine you have a 500 GB hard disk (block storage).
The disk is divided into blocks of 512 MB each.
This means there are 500 GB ÷ 512 MB ≈ 976 blocks in total on the disk.
Now, suppose you have 2 GB of data to store:
Each block can store 512 MB of data.
So, 2 GB ÷ 512 MB = 4 blocks are needed to store the 2 GB of data.
In this example, 4 blocks (each 512 MB) are used out of the total 976 blocks on the disk, leaving the remaining blocks available for more data.
AWS Block Storage
AWS provides block storage services to attach storage volumes to virtual servers (EC2 instances). These storage solutions are scalable, reliable, and designed for various use cases.
Types of AWS Block Storage
1. Amazon EBS (Elastic Block Store)
Persistent block storage for EC2 instances.
Data remains even after the EC2 instance is stopped or terminated.
Use Case: Databases, enterprise applications.
2. Amazon EFS (Elastic File System)
Managed file storage that can be shared across multiple EC2 instances.
Automatically scales based on usage.
Use Case: Shared file systems for multiple servers.
3. Ephemeral Storage (Instance Store or Temporary Storage)
Non-persistent storage directly attached to an EC2 instance.
Data is lost if the instance is stopped or terminated.
Use Case: Temporary files or caches.
Types of EBS
1. SSD-Based Volumes (Solid State Drives)
Designed for transactional workloads like databases and web servers.
gp2 (General Purpose SSD):
Balances price and performance.
Min & Max Vol : 1 GB,16 TB | Min IOPS: 100 | Max IOPS: 16,000 | Throughput: Up to 250 MiB/s.
io1 (Provisioned IOPS SSD):
High performance for I/O-intensive workloads.
Min & Max Vol : 4 GB,16 TB | Min IOPS: 100 | Max IOPS: 64,000 | Throughput: Up to 1,000 MiB/s.
Similarly, we also have gp3 , io2 ,etc.
2. HDD-Based Volumes (Hard Disk Drives)
Ideal for sequential workloads like big data or log processing.
st1 (Throughput Optimized HDD):
For frequently accessed, large datasets.
Min & Max Vol : 500 GB,16 TB | Min IOPS: 40 | Max IOPS: 500 | Throughput: Up to 500 MiB/s.
sc1 (Cold HDD):
For infrequently accessed data.
Min & Max Vol : 500 GB,16 TB | Min IOPS: 12 | Max IOPS: 250 | Throughput: Up to 250 MiB/s.
3. Magnetic Disk (Deprecated):
Older generation, now replaced by st1/sc1 for cost efficiency.
Min & Max Vol : 1 GB,1 TB | IOPS: N/A | Throughput: N/A.
NOTE : SSD (Solid State Drive) is generally much faster than HDD (Hard Disk Drive) due to fundamental differences in their design and technology. SSDs use flash memory to store data, so there are no spinning disks or moving read/write heads like in an HDD. This allows SSDs to access data almost instantly.
Analogy: Think of an SSD as a super-fast sports car and an HDD as a reliable but slower truck. The car (SSD) gets you to your destination quickly, but the truck (HDD) can carry more load at a lower cost.
Real-World Example
EBS: A startup runs a MySQL database on an EC2 instance using gp2 for fast reads/writes.
EFS: A media company stores videos on EFS, allowing multiple EC2 instances to process files simultaneously.
Ephemeral Storage: A gaming app uses instance storage for caching player session data, as it doesn’t need to be stored permanently.
The below diagram briefly summarizes the content we discusses above :

We get this while creating an ec2 instance :

On creating 4 ec2 instances in my AWS Free tier account , I observed something related to volumes :

Now , suppose if we delete one of the four ec2 instances like :


Now, if we go back to the Volumes section , we see :

IMPORTANT NOTE : By default, Delete Volume on Termination is set to Yes for the root volume of an EC2 instance. This means the root volume is automatically deleted when the instance is terminated. However, you can change this behavior during the instance creation.
During instance creation :

Suppose I create a new ec2 instance named “try” in which Delete on termination is set to “No” .

So, for 4 instances , we have 4 volumes :

Now , if we terminate the ec2 instance named “try” :

Even on terminating the ec2 instance “try” , we see that its volume still exists (this is because during its creation , we set Delete Volume on Termination to “No” ) :

CONCLUSION :
If you require data on a volume to persist after even an instance is terminated, then ensure that the "Delete on Termination" option is set to No for that volume.
Also, to avoid orphaned volumes and potential charges, ensure that the option is set to Yes if the volume is no longer needed post-termination.
Diagram explanation :

When an EC2 instance is created with an 8GB root volume, an 8GB block of storage is allocated in the AWS Storage Area (specifically, Elastic Block Store or EBS). If the Delete on Termination option is set to Yes (default for root volumes), the root volume will automatically be deleted when the instance is terminated

However, if Delete on Termination is set to No, the volume will persist even after the instance is terminated. In this case, the volume remains available in the AWS Storage Area and can be manually attached to another EC2 instance as needed.
Non-root volumes:
A non-root volume is an additional EBS volume that is attached to an EC2 instance apart from its root volume.
The root volume contains the operating system and is created by default when an instance is launched.
Non-root volumes, on the other hand, are optional and are primarily used to store additional data like application files, logs, databases, etc.
How to Create and Attach a Non-Root Volume to an EC2 Instance :
Configure the volume:
Size: Specify the size (e.g., 5 GiB).
Volume Type: Choose the desired type (e.g.,
gp3 for general-purpose SSD).Availability Zone: Ensure the availability zone matches the zone of the EC2 instance to which you want to attach the volume.
Click Create Volume.

The volume got created :

We can attach only that volume to an ec2 instance whose volume state is “Available”.

Click Actions > Attach Volume.
Select the instance you want to attach the volume to from the Instance dropdown.
Specify the device name (e.g.,
/dev/xvdbz). AWS will suggest a name automatically.Click Attach Volume.

Now, we can see below that the Volume state changed from Available to In-use on attaching it with the EC2 instance.

COMPARISON :
- Before attaching any volume :

- After attaching a volume :

NOTE : 1) lsblk Command:
Purpose: Lists all block storage devices attached to your system in a tree-like format.
fdisk -lCommand:
Purpose: Displays detailed information about the disk layout.
It is important to Detach a Volume Before Deleting It :

Upon detaching the volumes , we see that their volume state changed from In-use to Available .

Then , we can delete the undesirable volumes :

The volumes get deleted :

How to increase the Root Volume size ?
Locate the Root Volume:
Under the Elastic Block Store section, select Volumes.
Identify the root volume of your instance.
Modify the Volume:
- Select the root volume and click Actions > Modify Volume.

In the Modify Volume dialog:
Increase the size of the volume (e.g., from 8 GiB to 12 GiB).
Click Modify and confirm the changes.

Wait for the Update:
- The status of the volume will show as Modifying , then optimizing. Wait until the status changes back to In Use.


We can see above that the size increased from 8 to 12 GiB .
Log in to the Instance and check the Current Disk Size :

We see above that the size got changed as per our requirement. If by any chance , the changes don’t get reflected upon connecting to the instance , then :
If you are using the default
ext4file system, extend it with the following command:sudo resize2fs /dev/xvda1If you’re using
xfs(common for Amazon Linux 2), use:sudo xfs_growfs /Then Verify the New Disk Space:
df -h
NOTE:
xvda is the entire disk. The disk (xvda) is divided into the following partitions:
xvda1is your main OS partition.xvda14andxvda15are used for bootloader and firmware.xvda16is used for storing boot-related files.
Understanding Size, IOPS, and Throughput for AWS Volumes
Relation Between Size and IOPS (for gp2 Volumes)
IOPS (Input/Output Operations Per Second): Measures how fast the storage can handle read/write operations.
gp2 (General Purpose SSD) has a direct relationship between size and IOPS:
1 GiB to 33.3 GiB: IOPS = 100 (fixed baseline).
Beyond 33.3 GiB: For every 1 GiB increase in size, IOPS increases by 3.
Example:


Maximum IOPS:
gp2 supports up to 16,000 IOPS.
At 5,334 GiB, IOPS caps at 16,000.
Any size above 5,334 GiB will still provide 16,000 IOPS.


Burst IOPS (for gp2)
Burst IOPS = Temporary higher performance beyond the baseline IOPS.
Burst rate = 3,000 IOPS maximum.
Accumulation of Unused IOPS:
If your volume isn’t fully using its baseline IOPS, the unused capacity accumulates.
Example: Suppose we need 500 GiB volume for some work. By default, for 500 GiB size, we get 1500 IOPS :
Baseline = 1,500 IOPS; usage = 1,200 IOPS → 300 unused IOPS are saved.
If usage = 1,300 IOPS → 200 unused IOPS are saved. These saved IOPS get accumulated.
However, once accumulated IOPS reach 3,000, no more IOPS are added.
Understanding st1 (Throughput Optimized HDD)
Unlike SSDs, IOPS is not a fixed metric for
st1volumes.- Throughput (data transfer speed) is the key performance metric.
Throughput:
Baseline = 40 MB/s per TB.
Example:
Size = 500 GiB (0.5 TB) → Throughput = 0.5 × 40 = 20 MB/s.

Burst throughput is also possible for
st1, allowing temporary higher speeds based on workload.123 MiB/s: It means that the volume can handle up to 123 MiB/s for short durations if it has sufficient burst credits. However, note that 123 MiB/s is not the universal burst maximum for
st1volumes—the maximum burst throughput for anyst1volume is 250 MiB/s, but smaller volumes might have specific limits based on accumulated credits and usage patterns.
Choosing Amazon Volumes Based on Price Calculation
Amazon provides different types of storage volumes, each with varying prices and performance. The most commonly used ones are:
gp2/gp3 (General Purpose SSD): Good for most workloads.
io1/io2 (Provisioned IOPS SSD): For high-performance applications like databases.
st1 (Throughput-Optimized HDD): For large-scale, sequential data like big data analytics.
sc1 (Cold HDD): For infrequently accessed data like backups.
Example - 1 :
You need 500 GiB of storage for a medium-performance web server.
gp2: $0.10 per GiB-month + IOPS included.
- Cost: 500×0.10=50500 \times 0.10 = 50500×0.10=50 USD/month.
io1: $0.125 per GiB-month + $0.065 per provisioned IOPS/month.
If you need 1,000 IOPS:
Cost: (500×0.125)+(1000×0.065)=62.5+65=127.5(500 \times 0.125) + (1000 \times 0.065) = 62.5 + 65 = 127.5(500×0.125)+(1000×0.065)=62.5+65=127.5 USD/month.
Based on cost, gp2 is a better choice unless you need higher performance.
Example-2:
You have a choice between:
500 GiB (gp2) for $50/month.
1,000 GiB (gp2) for $100/month.
If your workload demands higher IOPS, the 1,000 GiB volume gives you more performance for double the cost. Moreover, cost-wise for the same IOPS (1000), we see : $100/m for gp2 and $127.5/m for io1.
Using RAID 0 for Certain Scenarios:
RAID 0 (Striping):
Combines multiple volumes into a single large volume.
Improves performance by splitting I/O operations across volumes.
No redundancy: If one volume fails, all data is lost.
When to Use RAID 0?
High performance is critical.
Data loss is acceptable (e.g., temporary data, caches).
Example:
You have two st1 volumes of 500 GiB each. Individually, each provides:
- Throughput: 40 MiB/s per TB.
With RAID 0:
Combined size: 1,000 GiB.
Combined throughput: 40×2=8040 \times 2 = 8040×2=80 MiB/s.
This setup is cost-effective for workloads like big data analysis, where performance matters more than durability.
Real-Life Decision-Making
Scenario 1: Hosting a Website
Requirement: 100 GiB storage, moderate performance.
Choice: gp2, as it provides sufficient performance at a low cost.
Scenario 2: Running a Database
Requirement: 500 GiB storage, high performance.
Choice: io1, as it allows custom IOPS (e.g., 5,000).
Scenario 3: Big Data Analytics
Requirement: 2 TiB storage, high throughput.
Choice: st1 in RAID 0 for increased throughput (e.g., 4 x 500 GiB).
Reducing EBS Volume Size:
Reducing the size of an Amazon EBS volume directly is not supported by AWS, since the size of a volume can only be increased, not decreased.

However, there are workarounds for reducing the volume size for both root volumes and non-root volumes.
Steps for Reducing EBS Volume Size
Back up your data: Before making any changes, create a snapshot of your existing root volume for safety
Create a new volume: Create a smaller volume with the desired size in the same Availability Zone (AZ) as your instance.
Attach the new volume: Attach the newly created volume to your EC2 instance.
Format and mount the new volume: Log into your instance, format the new volume, and mount it.
In Linux Instances
  # Format the new volume
  sudo mkfs -t ext4 /dev/xvdbf

  # Create a mount point
  sudo mkdir /mnt/newvolume

  # Mount the new volume
  sudo mount /dev/xvdbf /mnt/newvolume
Copy data to the new volume: Copy all data from the old root volume to the new volume. Use
rsyncfor efficient data transfer.sudo rsync -avxHAX / /mnt/newvolumeDetach and unmount the old volume: Stop the EC2 Instance, Detach the Old Root Volume, Attach the New Volume as Root and, Start the Instance.
Additional Tips
Consider Future Growth:
- Choose the size of the new volume carefully, considering potential data growth.
Data Migration Tools:
- Use
rsyncfor Linux orrobocopyfor Windows to transfer data reliably.
- Use
Snapshot Notes:
- Snapshots only capture data present at the time the snapshot is taken. Changes made afterward won't be included.
PRACTICAL :
- Initially , root volume(xvda) = 8GB :

- Creating a snapshot for the root volume :


- Created a new volume with reduced size (5GB) :

- Attached this new volume to the instance :

- Now , we can see the new volume (xvdbf) of 5GB :

6)Format the new volume :

- Create a mount point and, Mount the new volume :

- Copy data to the new volume using “sudo rsync -avxHAX / /mnt/newvolume” command :

- Stopped the instance and detached the old root volume :

- Also detached the new volume :

In order to attach it as root volume :

Now , after starting the instance , if you check for lsblk , you’ll get xvda of 5GB size .
MISSION ACCOMPLISHED!!!
EC2 Instance Types:
What are Instance Types?
Think of it like different sizes and strengths of computers based on what work you need them to do.
General Purpose: Good for balanced work (e.g.,
t2.micro,m5.large). Example: A simple website.Compute Optimized: Focuses on CPU power (e.g.,
c5.large). Example: Data analysis or gaming servers.Memory Optimized: Lots of RAM (e.g.,
r5.large). Example: Big databases or caching.Storage Optimized: Fast storage (e.g.,
i3.large). Example: High-speed data processing.Accelerated Computing: Uses GPUs (e.g.,
p3.large). Example: AI or machine learning.
EC2 On-Demand Pricing
What is On-Demand?
Pay for your EC2 instance only when you use it—by the second or hour.
No long-term commitment, flexible but more expensive for continuous use.
Key Points:
Reboot: Doesn’t affect billing.
Stop/Start: Can lose its “spot” on the physical machine (hypervisor).
Partial Hours: Even 10 minutes will count as a full hour.
Best Use: Good for short-term or testing.
EC2 Reserved Instance Pricing
What is a Reserved Instance?
Commit to an instance for 1 or 3 years.(Standard Reserved Instances can be purchased for a 1-year or 3-year term)
Up to 75% cheaper than On-Demand.
Key Points:
Drawbacks: You’re billed whether you use it or not. If stopped, the charges still apply.
Flexibility: You can resell it in the Reserved Instance Marketplace.
Best Use: Perfect for long-term, predictable workloads like production apps.
Scheduled Reserved Instance
What is it?
Reserve an instance for specific hours of the day (e.g., 9:30 AM to 5:30 PM).
Cheaper than On-Demand and more flexible than full Reserved Instances.
Key Points:
Guaranteed Capacity: The instance will always be available during the reserved window.
Limitations: Can’t use it outside the reserved time.
Spot Instance
What is it?
- Super cheap (up to 90% off), but AWS can stop it anytime if they need the capacity.
Best For:
- Non-critical jobs like batch processing or testing.
Key Points:
Interruptions: Not reliable for critical workloads.
Pricing: You set the maximum price you’re willing to pay.
Dedicated Instance
What is it?
- A virtual machine (EC2 instance) that runs on hardware just for you.
Best For:
- If you have compliance or licensing rules that don’t allow shared servers.
Dedicated Host
What is it?
- You rent an entire physical server and can run multiple EC2 instances on it.
Best For:
- Companies needing full control over the hardware.
EC2 Capacity Reservation
What is it?
- Reserve EC2 capacity in a specific region or Availability Zone (AZ).
Best For:
- Ensuring you have EC2 instances during high-demand times, like Black Friday.
How To Activate and Deactivate MFA on AWS root Account ?
At first, we will go the Security credentials option :

Next, we will go to “ Assign MFA “ :

Selecting the type of MFA that we require :

Suppose , I select for Authenticator app ( and name it “Microsoft-Authenticator”)

Suppose , I have the Microsoft-Authenticator app on my phone . I need to scan the QR code like below and, then enter the OTPs which I get on my authenticator app:

This way , MFA is successfully enabled.

So, now if we login for the Root Account ; apart from the credentials like email-id , password and captcha , we will also need to put the OTP which we will receive in our authenticator app :

If we want to deactivate MFA , we can simply remove it like below :

Manage Access Secret Key:
The Access Key and Secret Key in AWS are part of the authentication mechanism that allows programmatic access to AWS services.
The usual way to access any AWS service is to access via AWS Console after logging in , as shown below:

But if we want to access the above services via AWS CLI , then the usual login credentials won’t help much. For that , we need Access and Secret keys.
What Are Access and Secret Keys?
Access Key: A unique identifier for the root user or an IAM user.
Secret Key: A confidential key paired with the Access Key, used to sign requests to AWS services.
Together, they are used for programmatic access via the AWS CLI, SDKs, or APIs to interact with AWS resources.
Practical :


Now , let us try to make use of the access keys in a ubuntu VM :
First , we need to install the aws cli with the command sudo apt install awscli and then , we shall use the command : aws configure


Now, if we want , we can deactivate and delete the access keys , like:


What is IAM in AWS?
IAM (Identity and Access Management) in AWS is a service that helps you securely control access to your AWS resources. It allows you to manage who (identity) has access to what (permissions) within your AWS account.
Key Concepts of IAM
1. Users
Represents an individual person or service that needs access to AWS.
Example: A developer who needs access to the EC2 service.
2. Groups
A collection of users with similar permissions.
Example: A "Developers" group where all members can launch and manage EC2 instances.
3. Policies
Documents that define permissions. They specify what actions are allowed or denied.
Example: A policy that allows reading data from a specific S3 bucket.
4. Roles
Temporary credentials for applications or services to access AWS resources.
Example: A Lambda function that needs access to a DynamoDB table.
Why IAM when we already have root?
The root user has unrestricted access to your entire AWS account, making it risky to use for daily tasks. IAM allows you to create users with specific permissions, reducing the risk of accidental or unauthorized changes.
Example: Instead of giving a developer full access (root), you use IAM to let them only manage EC2 instances without touching billing or S3.
PRACTICAL:
Let me now create an IAM user using my root account :


This way , the IAM user is being created :

Click the mentioned Console sign-in URL and then , enter the User name and Console Password:

Change the Old Password to a New Password:

After Logging in as an IAM user ,since we only have the ec2readonly permission; hence, we can see the instances but can’t connect to them :


We can delete the user if no more required:

Creating an IAM Policy Using a JSON Template
An IAM policy is a document (written in JSON) that defines what actions are allowed or denied for specific AWS resources.
Why Create Policies Using JSON?
JSON gives precise control over permissions.
You can customize permissions to suit specific needs.
Steps to Create a Policy Using a JSON Template
Scenario Example:
You want to allow a user to only start, stop, or describe EC2 instances.
1. Define Your Policy in JSON
This JSON template allows user to start, stop, or describe EC2 instances :
{
    "Version": "2012-10-17",
    "Statement": [
        {
            "Effect": "Allow",
            "Action": [
                "ec2:DescribeInstances"
            ],
            "Resource": "*"
        },
        {
            "Effect": "Allow",
            "Action": [
                "ec2:StartInstances",
                "ec2:StopInstances"
            ],
            "Resource": "*"
        }
    ]
}
2. Go to the AWS Management Console
Open the IAM Console.
Navigate to Policies > Create Policy.
Switch to the JSON Editor.
3. Paste the JSON Template
Copy and paste the JSON template into the editor.
Click Next: Tags (optional step to add tags).
Click Next: Review.
4. Name Your Policy
Enter a name like
ec2startandstopReview the permissions.
Click Create Policy.
5. Attach the Policy
Go to Users or Groups.
Select the user or group that needs this policy.
Attach the ec2startandstop .


Now , we see that the IAM user kishaloy can stop ec2 instances :


Concept of IAM Group and IAM Role :-
1. IAM Group:
Definition: A collection of IAM users. Permissions applied to the group are inherited by all users in it.
Use Case: To manage permissions for multiple users easily.
Real-Life Practical Example:
You are managing a team with three developers: Alice, Bob, and Charlie.
All developers need EC2 full access to start and stop instances.
Instead of attaching policies to each user, you:
Create an IAM Group named
Developers.Attach the policy
AmazonEC2FullAccessto theDevelopersgroup.Add Alice, Bob, and Charlie to the group.
Result: All three developers inherit the AmazonEC2FullAccess permission from the group.
PRACTICAL: Suppose I’ve an IAM user named “Bob_Biswas” :

Currently, the user Bob_Biswas only has one Permission :

Let me now create a group named “Developers” with the permission “AmazonEC2FullAccess“ and attach that group to the user “Bob-Biswas” , then we get :


Now, we see that the user Bob_Biswas has two permissions (earlier it had only one as shown above) :

So now upon logging in as the IAM user Bob_Biswas , we can even start ec2 instances :

2. IAM Role:
Definition: Temporary access with specific permissions that a user, application, or AWS service can assume. Roles do not belong to any user but can be "assumed."
Use Case: When services or applications need permissions to perform actions on your AWS account.
Real-Life Practical Example:
Scenario: An application running on an EC2 instance needs to upload files to an S3 bucket.
Steps:
Create an IAM Role named
EC2-S3-Access.Attach the policy
AmazonS3FullAccessto this role.Assign the role
EC2-S3-Accessto the EC2 instance when launching it.
Result:
- The EC2 instance now has temporary access to upload files to the S3 bucket without needing permanent credentials.
PRACTICAL: Goal: Allow an EC2 instance to upload files to an S3 bucket.
Prepare the Environment:
Create an S3 Bucket:
Go to the S3 Service.
Click Create bucket and give it a name (e.g.,
my-demo-bucket).
Create an IAM Role:
Go to IAM > Roles.
Click Create role.
Choose Trusted Entity:
Select AWS Service and choose EC2.
Click Next.

Attach a Policy to the Role:
Search for
AmazonS3FullAccess.Select the policy, then click Next.

Name the role:
EC2-S3-Access.Click Create role.


Assign the Role to an EC2 Instance:
Launch a new EC2 instance or use an existing one.
We can modify an existing ec2 instance like this :


Similarly while creating an ec2 instance (let’s name it as “trial”), we can do like :
Under IAM role, select
EC2-S3-Access.
Complete the launch process.

Test the Role:
SSH into the existing EC2 instance
Upload a file to S3
  echo "Hello, AWS!" > test-file.txt
  aws s3 cp test-file.txt s3://my-example-bucket69/
Verify the file is in the S3 bucket :


Similarly, SSH into the newly created EC2 instance
Upload a file to S3

Final Outcome :

AWS CLI
AWS CLI (Command Line Interface) lets you manage AWS services using simple commands from a terminal, making it faster and more efficient than using the web console. It's important for automating tasks, scripting, and handling large-scale operations in AWS.
PRACTICAL:
At first I installed AWS CLI in my Ubuntu VM and then configured it with the help of access keys. Then , I verified its working by describing the instances :

Next , we can use the aws ec2 describe-regions command , which lists all the AWS regions available for your account, helping you identify where you can run resources :

If we want the above data in tabular format then , we can use the option “ --output table” :

How to create a New EC2 Instance using CLI ?
Find the AMI ID for your region (Amazon Machine Image): For example :
aws ec2 describe-images --filters "Name=name,Values=amzn2-ami-hvm-*-x86_64-gp2" --query "Images[0].ImageId"This returns the latest Amazon Linux 2 AMI ID.

If we want to see all the available ImageIds , we can simply use the command
aws ec2 describe-images, then we would get :
Create a Key Pair (if not already created):
 aws ec2 create-key-pair --key-name MyKeyPair --query "KeyMaterial" --output text > MyKeyPair.pem
 chmod 400 MyKeyPair.pem
Get the Subnet ID
Subnets belong to a VPC and are specific to an availability zone (AZ). To list subnets:
aws ec2 describe-subnets --query "Subnets[*].{SubnetID:SubnetId,AZ:AvailabilityZone,CIDR:SubnetArn,VPCID:VpcId}" --output tableThis command will show a table with:
SubnetID: The ID of the subnet .
AZ: The availability zone of the subnet (e.g.,
ap-southeast-1a).CIDR: The subnet's CIDR block.
VPCID: The VPC ID associated with the subnet.

Get the Security Group ID
Security groups control the inbound and outbound traffic for your instance. To list available security groups:
aws ec2 describe-security-groups --query "SecurityGroups[*].{GroupName:GroupName,GroupId:GroupId,Description:Description}" --output tableThis command will display:
GroupName: Name of the security group.
GroupId: ID of the security group (e.g.,
sg-0123456789abcdef0).Description: Description of the security group.

Launch an EC2 Instance:
aws ec2 run-instances --image-id ami-012088614f199e3a9 --count 1 --instance-type t2.micro --key-name MyKeyPair --security-group-ids sg-035a7fbefd842789c --subnet-id subnet-092737912b6240c35
So this way the ec2 instance got created . We can also verify its presence in the console :

If we want , we can also name our ec2 instance in the AWS CLI by :
 aws ec2 create-tags \
 --resources i-0238f27f93912b8ec
 --tags Key=Name,Value=Kishaloy
See the final result :

Step 3: Stop the EC2 Instance
Stop an Instance:
aws ec2 stop-instances --instance-ids i-0238f27f93912b8ec
Step 4: Terminate the EC2 Instance
Terminate an Instance:
aws ec2 terminate-instances --instance-ids i-08364f4e1f3221576
Verify Termination:
aws ec2 describe-instances --instance-ids i-08364f4e1f3221576 --query "Reservations[].Instances[].State.Name"The state should change to
terminated.
Step 5: Create a New Volume
Create a Volume:
aws ec2 create-volume --size 10 --availability-zone ap-southeast-1a --volume-type gp2
Note the Volume ID (
vol-0a32778d8c1fb11d4).Attach the Volume to an Instance:
aws ec2 attach-volume --volume-id vol-0a32778d8c1fb11d4 --instance-id i-0238f27f93912b8ec --device /dev/xvdf
We can also verify that the volume got attached to the instance by visiting the console :

Step 6: Delete a Volume
Detach the Volume:
aws ec2 detach-volume --volume-id vol-0a32778d8c1fb11d4
Delete the Volume:
aws ec2 delete-volume --volume-id vol-0a32778d8c1fb11d4
Proof : We can only see the root volume being attached , as we deleted the other volume :

Understanding Amazon S3 (Simple Storage Service)
Amazon S3 (Simple Storage Service) is a highly reliable, scalable, and cost-effective storage solution designed for storing object-based data. It's not meant for operating systems or database storage but is ideal for backups, file sharing, and static websites.
Key Concepts of S3
Object Storage:
Stores data as objects (file + metadata).
Each object has a unique key to identify it.
Examples: Backup files, images, videos, logs, etc.
Buckets:
A bucket is a container for storing objects.
You create a bucket, upload your data into it, and access it using a unique URL.
Example: Bucket name:
my-backup-bucket; Object:image.jpg→ URL:https://my-backup-bucket.s3.amazonaws.com/image.jpg
Unlimited Storage:
- S3 can hold unlimited objects in a bucket, making it perfect for large-scale backups.
High Availability and Reliability:
SLA (Service Level Agreement): 99.999999999% (11 9s) durability for data.
Your data is automatically replicated across multiple availability zones.
Scalability:
- S3 can handle any amount of data and grows automatically without manual intervention.
Pay-as-You-Go:
- You pay for the storage you use, data transfers, and requests (e.g., GET, PUT).
Why S3?
Compared to Block Storage:
Block Storage (e.g., EBS): Ideal for OS, databases, and applications needing low latency.
S3: Designed for large-scale data storage where latency isn't critical (e.g., backups, static websites).
Compared to EFS:
EFS (Elastic File System): Ideal for sharing files among multiple servers.
S3: Best for archival, backups, or storing media files accessed via applications.
Compared to Ephemeral Storage:
Ephemeral Storage: Temporary, fast storage tied to EC2 instances, lost when the instance is terminated.
S3: Persistent and permanent storage for important data.
Backup Use Case:
- S3 is reliable, scalable, and cost-efficient for backups with features like versioning (Keeps multiple versions of the same file for recovery.), replication, and lifecycle policies to manage data retention.
How to Mount S3 bucket on EC2 Linux (Ubuntu) Instance :
sudo apt-get update
sudo apt-get install automake autotools-dev fuse g++ git libcurl4-gnutls-dev libfuse-dev libssl-dev libxml2-dev make pkg-config
git clone https://github.com/s3fs-fuse/s3fs-fuse.git
Now change to source code directory, and compile and install the code with the following commands:
cd s3fs-fuse
./autogen.sh
./configure --prefix=/usr --with-openssl
make
sudo make install
Use the below command to check where the s3fs command is placed in O.S. It will also tell you the installation is ok.
which s3fs

Create a new file in /etc with the name passwd-s3fs and Paste the access key and secret key in the below format.
sudo touch /etc/passwd-s3fs
sudo vim /etc/passwd-s3fs
Format : Your_accesskey:Your_secretkey

Change the permission of the file : sudo chmod 640 /etc/passwd-s3fs
Now create a directory or provide the path of an existing directory and mount S3bucket in it :-
mkdir /mys3bucket
s3fs your_bucketname -o use_cache=/tmp -o allow_other -o uid=1001 -o mp_umask=002 -o multireq_max=5 /mys3bucket
Now , since I had the below s3-bucket :

Hence , I used the command : sudo s3fs my-example-bucket69 -o use_cache=/tmp -o allow_other -o uid=1001 -o mp_umask=002 -o multireq_max=5 /mys3bucket
Now, on doing “df -h” , we see that the “s3fs” is Mounted on the mys3bucket directory :

Now , if we go inside the mys3bucket directory and check its contents , we see that it matches with the contents of my actual S3 bucket (my-example-bucket69) :

Now suppose we create some files or folders inside the mys3bucket directory through the ubuntu instance, we will see that the result gets reflected on the actual S3 bucket :


So the above observation confirms that the s3 bucket got mounted successfully.
Steps to Host a Static Website on S3:
Suppose I want to host a static website :
Create an S3 bucket named
static-website69.
Upload your files (
index.html,style.css).
Configure the bucket as a static website:

Set Permissions for Public Access :
Go to Permissions Tab: Navigate to the Permissions tab in your bucket.
Update Bucket Policy:
Scroll down to the Bucket policy section.
Click Edit and add the following policy to make your bucket objects publicly readable:
  {
    "Version": "2012-10-17",
    "Statement": [
      {
        "Effect": "Allow",
        "Principal": "*",
        "Action": "s3:GetObject",
        "Resource": "arn:aws:s3:::static-website69/*"
      }
    ]
  }
Visit the URL:

I can finally see my static website :

What is S3 Versioning?
S3 Versioning is a feature that allows you to keep multiple versions of an object in an S3 bucket. When enabled, any time you upload a new version of a file with the same name, the older version is retained instead of being overwritten.
Why Use S3 Versioning?
Accidental Deletion: Recover files if someone accidentally deletes them.
Changes Tracking: Maintain a history of changes for your files.
Disaster Recovery: Protect against data corruption or unintended changes.
How S3 Versioning Works
Before Versioning: If you upload a file with the same name, it overwrites the previous file. The old file is permanently gone.
After Versioning: Every time you upload a file with the same name, S3 keeps the old file as a different version.
Each file has a unique Version ID, and S3 uses it to track all versions of an object.
Practical :
Suppose currently my bucket has two files: Degree.pdf and kk.txt ( content: “Hello, I'm KK” )

Let me enable Versioning for this bucket :

Now, if I delete the Degree.pdf file and also upload a new kk.txt file (content :”Hello, I'm Kishaloy) , we see:


What is S3 Transfer Acceleration?
S3 Transfer Acceleration is a feature in Amazon S3 that speeds up the transfer of files to and from S3 buckets. It uses Amazon CloudFront’s globally distributed edge locations to reduce latency and improve upload/download speeds, especially for users far from the S3 bucket's region.
How Does It Work?
Without Transfer Acceleration:
- When you upload a file to an S3 bucket, your data travels directly from your location to the bucket’s region. If you're far away from the bucket's region, uploads might be slow due to higher latency.
With Transfer Acceleration:
Instead of sending the data directly to the bucket, the file is first uploaded to the nearest CloudFront edge location.
From the edge location, the data travels over Amazon’s optimized network to the S3 bucket.
This process is faster because CloudFront's network is designed to handle such transfers efficiently.
Why Use Transfer Acceleration?
Improves Upload/Download Speeds:
- Ideal for users in remote locations or regions far from the S3 bucket.
Reliable Data Transfer:
- Amazon’s internal network is faster and more reliable than the public internet.
Global Access:
- Accelerates transfers for users all over the world.
PRACTICAL :
Suppose I have uploaded a video in my S3 bucket :

Now , if someone downloads this media file :

NOTE: The wget command is used to download files from the internet.
We can see above that the downloading process is taking some time ( around 60 seconds).
Hence , in order to reduce this downloading time , let me enable Transfer Acceleration to this bucket :

Now, after enabling it , if we re-try to download the same video file ":

We see above that this time it’s taking lesser time for downloading than before ( 2.5 seconds only).
NOTE BASED ON EXPERIENCE : While I was trying to use the wget command on the above s3 video file , I was getting permission denied type errors . In order to mitigate this problem , I did the following things:
Turned Block all public access to Off .
Attached the following Bucket Policy :
{
    "Version": "2012-10-17",
    "Statement": [
        {
            "Effect": "Allow",
            "Principal": "*",
            "Action": "s3:GetObject",
            "Resource": "arn:aws:s3:::my-example-bucket69/*"
        }
    ]
}
After the above two steps , my issue got resolved.
S3 Requester Pays
Normally, in Amazon S3, the bucket owner pays for the storage and data transfer costs when someone downloads files from their bucket.
With Requester Pays, the cost of downloading data is shifted to the person requesting the data (the downloader), not the bucket owner. This is useful when the bucket owner wants others to pay for the data they download, such as in the case of public datasets.
Real-Life Example:
Imagine you’re a researcher who uploads a large public dataset (like weather data) to an S3 bucket. If thousands of people download this data, the download costs can become very high for you, the bucket owner.
Instead of paying for everyone's downloads:
Enable Requester Pays on your bucket.
Now, anyone who downloads the data will pay for the bandwidth costs themselves.
We can enable it like :

Different Types of Amazon S3 Storage Classes :

1. S3 Standard (General Purpose)
Use Case: Frequently accessed data.
Features:
99.99% availability and 11 9's durability.
Designed for data that requires low latency and high throughput.
Stores data in multiple availability zones (AZs) for high reliability.
Example: A website hosting service stores user-uploaded photos that need to be accessible instantly.
Cost: Higher than other classes but ideal for critical and frequently accessed data.
2. S3 Intelligent-Tiering (Cost-Optimized)
Use Case: Data with unpredictable or changing access patterns.
Features:
Automatically moves objects between access tiers (frequent and infrequent) based on usage.
No retrieval fees.
Designed to save costs without manual intervention.
Example: A company stores application logs that are frequently accessed initially but rarely used later. Intelligent-Tiering automatically optimizes storage costs.
Cost: Slightly more expensive than Standard for frequent access but saves cost by automatically moving infrequent data to cheaper tiers.
3. S3 Standard-IA (Infrequent Access)
Use Case: Data accessed less frequently but still requires quick retrieval.
Features:
Lower storage cost than S3 Standard.
Slightly higher retrieval cost.
Stored across multiple AZs.
Example: Monthly sales reports that are accessed during audits but need to be available on-demand.
Cost: Cheaper storage cost with higher retrieval charges compared to S3 Standard.
4. S3 One Zone-IA (Infrequent Access in a Single Zone)
Use Case: Data that can be recreated easily if lost and doesn't need multi-AZ replication.
Features:
Lower cost than Standard-IA.
Data is stored in only one AZ, so less durable in case of AZ failure.
Example: Backup copies of non-critical data like processed log files that can be regenerated.
Cost: Lowest cost for infrequent access data but slightly less reliable due to single-AZ storage.
5. S3 Glacier (Archival Storage)
Use Case: Data that is rarely accessed but must be retained for compliance or backup purposes.
Features:
Low-cost storage designed for long-term data archiving.
Retrieval times: Minutes to hours (depending on retrieval option).
Example: A movie production company archives old film footage that is rarely accessed but must be preserved.
Cost: Very low storage cost but retrieval charges apply. Retrieval time is slower compared to other classes.
6. S3 Glacier Deep Archive (Lowest Cost Archival Storage)
Use Case: Data accessed very rarely (e.g., once a year) but must be preserved for regulatory compliance.
Features:
Cheapest storage option.
Retrieval times: 12 to 48 hours.
Example: Banking institutions store old financial transactions for legal compliance, accessed only during audits or legal disputes.
Cost: Cheapest option for long-term archival, but retrieval is slow and costly.
S3 Lifecycle Rule:
Amazon S3 Lifecycle Rules help you automatically manage the storage of objects in your bucket by transitioning them to a more cost-effective storage class or by deleting them after a set period of time.
Why Use Lifecycle Rules?
Save Money: Move rarely accessed data to cheaper storage (like Glacier or Intelligent-Tiering).
Automate Cleanup: Delete old or unnecessary files automatically.
Real-Life Example: S3 Lifecycle Rules
Scenario:
You manage a video streaming platform where users upload videos daily. The videos are accessed frequently in the first month but rarely after that. To save costs, you decide to optimize your storage based on the access pattern.
Solution Using S3 Lifecycle Rules:
Storage Policy:
First 30 days: Store videos in the S3 Standard storage class for fast access.
Day 31 to Day 90: Move videos to S3 Standard-IA (Infrequent Access) to reduce costs since they are rarely accessed.
After 90 days: Archive videos to S3 Glacier for long-term storage at the lowest cost.
After 1 year: Delete videos automatically if they are no longer needed.
Lifecycle Rule Configuration:
Transition to Standard-IA after 30 days.
Transition to Glacier after 90 days.
Delete objects after 1 year.
Important AWS CLI S3 Commands :
| Command | Purpose |
aws s3 ls | List all buckets. |
aws s3 mb s3://bucket-name | Create a new bucket. |
aws s3 rb s3://bucket-name | Delete a bucket (bucket must be empty). |
aws s3 cp | Copy files between local system and S3. |
aws s3 mv | Move files between local system and S3. |
aws s3 rm | Delete objects in S3. |
aws s3 sync | Sync local folder with S3 bucket. |
aws s3 presign | Generate a pre-signed URL for an object in S3. |
Outcomes of the s3 ls,s3 mb,s3 rb commands :

Outcomes of the s3 cp command for COPYING files and directories :


Using s3 cp command to download :
SYNTAX to Download Data from S3:
Download Single File:
aws s3 cp s3://your-bucket-name/file.txt /path/to/local/Example:
aws s3 cp s3://my-bucket/index.html ./Download Entire Bucket:
aws s3 cp s3://your-bucket-name/ /path/to/local/ --recursive

So above , we have downloaded the myapp.py file from the bucket.
Command to List All Contents of an S3 Bucket
aws s3 ls s3://<bucket-name> --recursive

Remove Data
Delete a File:
aws s3 rm s3://your-bucket-name/file.txt
Delete All Files in a Bucket:
aws s3 rm s3://your-bucket-name/ --recursive

Generate Pre-Signed URL
Create a pre-signed URL to share a private file:
aws s3 presign s3://your-bucket-name/file.txt --expires-in 3600
This creates a URL valid for 1 hour (3600 seconds).

Sync Data
Why Do We Sync Data?
Syncing data ensures that the content between two locations (e.g., local system and S3 bucket) is consistent.
Why Sync Is Better Than cp?
aws s3 cp: Copies files from one location to another without checking for duplicates or updates. It’s ideal for single file transfers.aws s3 sync: Detects differences (new, modified, or missing files) and only transfers those. It’s efficient for maintaining consistency between two locations.
Sync Local Directory to S3:
aws s3 sync /path/to/local/dir s3://your-bucket-name/Sync S3 Bucket to Local Directory:
aws s3 sync s3://your-bucket-name/ /path/to/local/dir
S3 Cross-Region Replication (CRR)
What is CRR?
Cross-Region Replication automatically copies objects from one Amazon S3 bucket to another bucket in a different AWS region.
Why Use It?
Disaster Recovery: If one region goes down, data is still available in another region.
Performance: Serve content to users from a closer region for lower latency.
Compliance: Meet regulations that require storing data in specific regions.

Example Scenario:
You run an e-commerce website. Your main S3 bucket is in the US-East (Virginia) region. To serve European users faster and ensure redundancy, you replicate the bucket to EU-West (Ireland).
How It Works:
Source Bucket: Your primary bucket where data is initially uploaded.
Destination Bucket: The bucket in the different region where data gets replicated.
Replication Rule: You define what objects to replicate (e.g., all objects or only those with a specific tag).
Key Points:
Requires enabling versioning on both buckets.
Can replicate specific objects or all objects.
One-way replication: Changes in the destination bucket are not replicated back to the source.
PRACTICAL :
Suppose I have two buckets : my-example-bucket69 {Source bucket; us-east-1} and my-example-bucket70 {Destination bucket; ap-southeast-1} . Also , I have enabled versioning in both of these buckets {COMPULSORY}.

I created the replication rules :


Now, suppose if I create a new folder in the source bucket named “Kishaloy“ .

Then, automatically we get the folder Kishaloy in the destination bucket:

S3 Cross-Account Access
What is Cross-Account Access?
Allows you to grant another AWS account access to your S3 bucket.

Example Scenario:
A media company (Account A) uploads high-quality videos to an S3 bucket. Their marketing partner (Account B) needs access to those videos for promotional campaigns.
How It Works:
Bucket Owner (Account A):
Creates an S3 bucket.
Grants access to Account B using a bucket policy or Access Control List (ACL).
Other Account (Account B):
- Accesses the bucket using AWS CLI, SDK, or console, as permitted by the policy.
Key Points:
Policies can be restrictive (read-only) or permissive (read/write).
You can use IAM roles for temporary access instead of sharing keys.
What are the factors on which S3 billing happens?
Amount of data (GB's) which is store on S3.
Example: If you store 500 GB in S3, you pay for those 500 GB.
Based on storage Class.
Example:
Standard Class (frequent access): Higher cost but faster retrieval.
Glacier Class (archival): Lower cost but slower retrieval.
The amount of data out which happens from your bucket - Data out charges you have to pay.
Example: A 1 GB file downloaded from S3 to your local machine incurs a data-out cost.
The amount of request which happens on your S3 bucket.
Example:
Uploading 1000 files (using PUT requests) incurs charges for 1000 requests.
GET requests (e.g., downloading files) also have a cost.
Request Put object, get object, delete object, move object, list obj.
Example:
PUT, COPY, POST, LIST: Higher cost because they involve data writing or organization.
GET and SELECT: Lower cost because they involve data retrieval.
Setting Up Your Own Private Cloud in AWS:
Creating a private cloud in AWS involves using Amazon Virtual Private Cloud (VPC). A VPC is a logically isolated section of AWS where you can launch resources like EC2 instances in a secure, controlled environment.
What is a VPC?
Definition: A VPC is your private cloud within AWS. You control its network, such as IP ranges, subnets, route tables, gateways, and security settings.
Example: Imagine you're building a company's private IT infrastructure but in the cloud. AWS gives you a virtual "network box" (VPC) to set up your environment securely.
Why Use a VPC?
Isolation: Keep your resources private and secure.
Customization: You control IP ranges, subnets, and routing.
Security: Apply firewalls, security groups, and network ACLs.
Integration: Connect your on-premises data center with AWS.
VPC Architecture Components
CIDR Block (IP Address Range):
Definition: The range of private IP addresses for your VPC (e.g., 10.0.0.0/16).
Example: Think of it as your private internet network.
Key Tip: Start with a wide range (e.g.,
/16gives you 65,536 IPs).
Subnets:
Definition: Sub-divisions of a VPC to group resources.
Example: One subnet for public-facing resources (e.g., web servers) and another for private resources (e.g., databases).
Types: Public (accessible from the internet) and Private (restricted).
Internet Gateway (IGW):
Definition: Connects your VPC to the internet.
Example: Like the main door to your house.
NAT Gateway (Network Address Translation):
Definition: Allows private instances to access the internet (e.g., for updates) without being exposed.
Example: Like a proxy server for private resources.
Route Tables:
Definition: Defines the paths that network traffic follows.
Example: A route table with a rule: "Send internet traffic (0.0.0.0/0) to IGW."
Security Groups:
Definition: Acts as a firewall for resources, controlling inbound/outbound traffic.
Example: Allow SSH (port 22) access to EC2 instances from your office IP.
Network ACLs (Access Control Lists):
Definition: Optional layer of security at the subnet level.
Example: Block all traffic from a suspicious IP range.
Peering Connections:
Definition: Connect two VPCs privately.
Example: Connect your VPC in the US with another VPC in Europe.
VPC Endpoints:
Definition: Securely connect to AWS services without an internet gateway.
Example: Access S3 from your VPC without using the public internet.
Practical: Step-by-Step to Set Up a Private Cloud in AWS
Go to the AWS Management Console > VPC Dashboard.
Click Create VPC.
Enter:
Name:
MyPrivateCloudCIDR Block:
10.0.0.0/16
Customize the Availability Zones.
Select the required number of public and private subnets.
Select for NAT gateways and VPC endpoints.
Enable DNS resolution and DNS hostnames.
See the execution below :-


Final outcomes :-


Advantages of Using Private Cloud in AWS
Customizable: Full control over network settings.
Security: Isolated network with fine-grained permissions.
Scalability: Add resources or connect with other regions/VPCs.
Integration: Securely extend your on-premises data center.
Disadvantages
Complexity: Requires network knowledge to design properly.
Cost: Components like NAT Gateways and data transfers add to costs.
Management Overhead: You must maintain IP ranges, routing, and security.
My above VPC Setup Overview:
VPC Name:
MyPrivateCloud-vpcSubnets:
Public Subnet:
MyPrivateCloud-subnet-public1-ap-southeast-1ainap-southeast-1a.Private Subnet:
MyPrivateCloud-subnet-private1-ap-southeast-1ainap-southeast-1a.
Route Tables:
Public Route Table: associated with the public subnet and routes traffic to the Internet Gateway.
Private Route Table: associated with the private subnet and routes traffic through the NAT Gateway. The private route table also includes a route to the VPC Endpoint for S3 (helpful if we want instances in the private subnet to access Amazon S3 without using the public internet).
Network Connections:
Internet Gateway (IGW):
MyPrivateCloud-igwfor internet access.NAT Gateway:
MyPrivateCloud-nat-public1-ap-southeast-1afor private subnet internet access.VPC Endpoint for S3:
MyPrivateCloud-vpce-s3to connect securely to S3 without using the public internet.
Verify Connectivity and Test Your VPC Setup
Now, let’s test the VPC configuration by launching instances and verifying functionality:
Step 1: Test the Public Subnet
Launch an EC2 instance in the public subnet (
MyPrivateCloud-subnet-public1-ap-southeast-1a).Assign a public IP address.
Associate a security group allowing SSH (port 22) and HTTP (port 80) access from your IP or the internet.

Connect to the instance using SSH.
Run a
pingcommand to test internet connectivity:ping google.comIf the connection works, your public subnet is configured correctly.

Therefore, the public subnet is configured correctly.
Step 2: Test the Private Subnet
Launch an EC2 instance in the private subnet (
MyPrivateCloud-subnet-private1-ap-southeast-1a).Do not assign a public IP address.
Use a security group that allows SSH only from the public instance. [ Note: the Private IP of the public instance must be used as Source ]

Connect to the private instance through the public instance using SSH bastion:
SSH into the public instance first.
From the public instance, SSH into the private instance using its private IP.
In order to do that , use the command :
ssh -i <PRIVATE_KEY.pem> username@<PRIVATE_INSTANCE_IP>
Test internet connectivity:
Try to
pingan external site (e.g.,pinggoogle.com).If it works, your NAT Gateway is configured correctly.

Since the above ping is successful , thus , NAT GATEWAY is working fine.
If we try to ssh into the private instance from any other system (apart from the public ec2 instance) , then connection will obviously get refused :

Step 3: Test the S3 Endpoint
Log in to the private instance.
Install the AWS CLI if not already installed.

Use the CLI to list objects in an S3 bucket:
aws s3 ls s3://your-bucket-name --region ap-southeast-1This should work because your S3 VPC endpoint (
MyPrivateCloud-vpce-s3) enables direct access to S3.
Initially , the above command wasn’t working fine but then I realized that instance shall have an IAM role with the appropriate permissions attached:

Therefore, the S3 VPC endpoint is working fine .
SOME EXTRA THEORY => IPv4 (Internet Protocol version 4) vs IPv6 (Internet Protocol version 6) :
1) IPv4 (Internet Protocol version 4):
Address Format: IPv4 addresses are 32-bit numbers, written as four decimal numbers separated by dots. Example:
192.168.1.1Total Number of Addresses: About 4.3 billion unique addresses (2³²).
Example:
- Your home router might have an IPv4 address like
192.168.0.1.
- Your home router might have an IPv4 address like
2) IPv6 (Internet Protocol version 6):
Address Format: IPv6 addresses are 128-bit numbers, written as eight groups of hexadecimal numbers separated by colons. Example:
2001:0db8:85a3:0000:0000:8a2e:0370:7334Total Number of Addresses: a really huge number (2¹²⁸ addresses).
Example:
- A server or cloud instance might have an IPv6 address like
2401:db00:3020:70e8::1.
- A server or cloud instance might have an IPv6 address like

AWS VPC Peering :
AWS VPC Peering allows two Virtual Private Clouds (VPCs) to communicate directly over private IPs without going through the internet. This means they can share resources securely, as if they were part of the same network, even if the VPCs belong to different AWS accounts or are in different regions.
Why Use VPC Peering?
Security: No traffic goes over the public internet.
Cost-effective: Avoids charges for internet gateways (IGWs) or NAT gateways.
Simplicity: Once peered, VPCs can directly communicate over private IPs.
How Do VPCs Normally Communicate Without Peering?
Without VPC Peering, VPCs communicate through the internet, like this:
VPC-A sends data via its internet gateway (IGW) to the ISP (Internet Service Provider).
The data travels across the internet to the IGW of VPC-B.
VPC-B receives the traffic and routes it to the destination.
This method:
Involves public IPs.
Adds latency since traffic goes through the internet.
Exposes traffic to potential security risks.
What Happens with VPC Peering?
With VPC Peering:
VPC-A (AWS Dev Account) and VPC-B (AWS Test Account) establish a peer connection.
Traffic between them stays within AWS's private network.
You no longer need public IPs or internet gateways for communication.
The below diagram gives us a good idea of the above theory

Limitations of VPC Peering
One-to-one peering: You can’t transit traffic through a peered VPC. Transitive routing is a network concept where traffic from one network is allowed to pass through another network to reach a third network.
Cross-region data transfer costs: Traffic between North Virginia and Singapore incurs inter-region data transfer fees.
Site to Site VPN :

What is a Site-to-Site VPN?
A Site-to-Site VPN is a secure, encrypted connection between two networks over the internet. In this case:
One site is your AWS VPC, where your cloud resources are hosted.
The other site is your on-premise (in-house) network, such as your office data center or a local server.
The VPN ensures that data can securely travel between the two locations as if they were part of the same private network.
Architecture Overview
Here’s how the setup looks step by step:
AWS VPC: Your VPC contains subnets (private and public) in same or different Availability Zones (AZs), hosting your AWS resources like EC2 instances.
Router in VPC: The subnets are connected to an internal router that forwards traffic.
Virtual Private Gateway (VPG): This is an AWS component attached to your VPC. It acts as the VPN endpoint on the AWS side.
VPN Connection: The secure tunnel that connects the VPG to your Customer Gateway.
Customer Gateway (CGW): This represents your on-premise network’s router or firewall capable of handling VPN connections.
On-premise Network: The local network where your physical servers or machines reside. The CGW is part of this network.
How It Works (Before and After VPN Connection)
Before VPN: AWS VPC and on-premise machines cannot communicate directly. If you try to "ping" an on-premise machine from an AWS EC2 instance (or vice versa), the traffic is blocked because they are in separate networks without a secure link.
After VPN: Once the Site-to-Site VPN is established, the two networks behave as one. The EC2 instance in AWS can ping or communicate with the on-premise machine over the secure VPN tunnel..
Practical:
Create a VPC: I already created a VPC (above).
Set Up a Virtual Private Gateway (VPG):
In the VPC Dashboard, create a Virtual Private Gateway.
Attach the VPG to your VPC.


Configure the Route Table:
Update the route table of your subnets to include a route to the VPG for traffic destined for the on-premise network. NOTE: The destination must have the public ip of the on-premise network.


Set Up the Customer Gateway (CGW):
Define the Customer Gateway in AWS by providing the public IP address of your on-premise router/firewall.
This represents the VPN endpoint on the on-premise side.

Create a VPN Connection:
In AWS, create a Site-to-Site VPN Connection between the VPG and the CGW.
AWS will generate configuration files for different VPN devices (e.g., Cisco, Juniper). Use these files to configure your on-premise router.


Download VPN Configuration:
Download the VPN configuration file from AWS. This file contains details like:
Pre-shared key (used for authentication between AWS and on-premise).
Tunnel IP addresses.
Routing details.

On-premise Setup
Configure the Customer Gateway Device:
Since I don’t have any hardware device, so I can use a Linux server as the Customer Gateway; I need to follow these steps: Install StrongSwan on Linux machine that will act as the gateway:
  sudo apt update
  sudo apt install strongswan strongswan-pki
Use the VPN configuration file provided by AWS (above) to configure on-premise router or firewall.
Set up the IPsec tunnel, specifying:
Pre-shared key.
Tunnel endpoints.
Encryption algorithms.
Steps :- Edit
/etc/ipsec.conf: Define the VPN connection parameters and, Edit/etc/ipsec.secrets: Add the pre-shared key (PSK) provided by AWS.


Do configure everything properly so that the state of tunnel1 and tunnel2 are “Up” .
Testing the Connection
Verify the VPN Status:
- In the AWS Management Console, check the status of your VPN connection. It should say UP once both tunnels are established.
Ping Test:
From your on-premise machine, try to ping the private IP of an EC2 instance in your AWS VPC.
From your EC2 instance, try to ping the private IP of the on-premise machine.
Troubleshooting:
Ensure that security groups in AWS allow ICMP (ping) traffic.
Check that your on-premise firewall allows traffic from the AWS VPC CIDR.
Client-VPN-Endpoint :
Think of it as a secure gateway that allows users (or devices) from anywhere on the internet to connect securely to your AWS resources (e.g., servers, databases) inside a VPC (Virtual Private Cloud).
It acts like a private tunnel:
The end user connects to the Client VPN Endpoint from their computer using a VPN client (e.g., OpenVPN).
The Client VPN Endpoint verifies the user’s credentials.
Once authenticated, the user is securely connected to the VPC Subnet.

Let me explain the above diagram in the form of an example :-
Setup:
Client VPN Endpoint is created in AWS North Virginia (us-east-1).
It’s associated with a VPC Subnet (Subnet-1: 10.100.1.0/24) in VPC-A (10.100.0.0/16).
End users connect to this Client VPN Endpoint using their computers.
Once Connected to the VPN: After the user connects to the Client VPN Endpoint, they can reach the subnet (Subnet-1) inside the VPC.
If the VPC has a VGW (Virtual Gateway) connected to an on-premise network through a Site-to-Site VPN, the user can access on-premise resources. If the VPC subnet is connected to an IGW (Internet Gateway), the user can access the internet from the subnet and reach AWS services like S3, DynamoDB, etc., which are publicly accessible. If the VPC is peered with another VPC (e.g., VPC-B), the user can access resources in the peered VPC as well.
In order to do it in PRACTICAL , we can follow the below tutorial :-
https://www.youtube.com/watch?v=JVja4o-3kIk
Also , to generate the server and client certificates and keys to upload them to ACM, follow the link :- https://docs.aws.amazon.com/vpn/latest/clientvpn-admin/client-auth-mutual-enable.html
What is OpenVPN?
OpenVPN is a popular, open-source VPN (Virtual Private Network) software that allows you to securely connect to a private network (like your VPC or data center) over the public internet. It creates an encrypted "tunnel" for your data, ensuring privacy and security even when you're using an insecure public network (like a hotel Wi-Fi or a coffee shop).
Scenario: Accessing a VPC/Data Center via OpenVPN :-
Suppose you're on vacation in a public place, like a coffee shop, and you suddenly need to access your VPC (in AWS) or a data center for work.
The VPC or data center is in a private network that can't be accessed directly from the internet.
Using OpenVPN, you can securely connect to this private network over the public internet and access its resources (like EC2 instances, databases, or internal servers).
How OpenVPN Works (Simplified)
Install OpenVPN Server:
The private network (VPC or data center) has an OpenVPN server installed.
This server handles incoming VPN connections from remote users like you.
Install OpenVPN Client:
On your laptop or mobile device, you install the OpenVPN client software.
The client is used to establish the connection to the OpenVPN server.
Connection Setup:
On doing some configuration , we can securely connect to the server.
The connection creates an encrypted tunnel between your device and the private network.
Private Network Access:
Once connected, your device behaves as if it's part of the private network.
You can now access resources in the VPC or data center, such as internal applications, servers, or databases.
PRACTICAL : You can follow this link to perform the above stuff => https://www.youtube.com/watch?v=R7-dj5dvpzA
AWS Security Groups:

In simplest terms, Security Groups (SGs) are like virtual firewalls attached to your EC2 instances. They control both inbound (traffic coming into the instance) and outbound (traffic leaving the instance) network traffic by using rules.
Scenario :
When you run:
ssh username@13.23.45.17Your laptop's SSH client sends a request to the public IP (13.23.45.17) of your EC2 instance.
The Internet Gateway (IGW) translates this public IP to the private IP (10.0.0.4) of your EC2 instance within the VPC.
Role of the Security Group:
Before the request reaches the EC2 instance, it must pass through the Security Group (SG) attached to the instance.
For the request to succeed:
The SG inbound rule must allow:
Type: SSH
Protocol: TCP
Port: 22
Source: Your laptop’s IP address (or
0.0.0.0/0{anywhere on the internet} for allowing all sources).
Once the SSH connection is established, any response traffic (like terminal commands sent back to your laptop) does not require explicit outbound rules because SGs are stateful firewalls:
- Stateful means if a connection is allowed in one direction (inbound), the return traffic is automatically allowed (outbound).
Example: Accessing Apache Server (Port 80)
If you have Apache (web server) installed on the EC2 instance and want to access the web page, the SG must have:
Type: HTTP
Protocol: TCP
Port: 80
Source: Your laptop’s IP or
0.0.0.0/0.
Commonly Used Ports, Types, and Protocols
| Type | Protocol | Port Number | Use Case |
| SSH | TCP | 22 | Securely connect to your server from a remote machine. |
| HTTP | TCP | 80 | Access websites hosted on the server. |
| HTTPS | TCP | 443 | Access secure websites (encrypted traffic). |
| MySQL/Aurora | TCP | 3306 | Connect to MySQL databases. |
| Custom TCP | TCP | Custom Port | Used for specific applications, e.g., a custom web server running on 8080. |
| ICMP - IPv4 | ICMP | N/A | Allow ping (used for diagnostics). |
| All Traffic | All | All Ports | Permit all traffic (not recommended for production environments). |
Difference Between Security Groups and Network ACLs:
| Aspect | Security Group (SG) | Network ACL (NACL) |
| Attached to | EC2 instance | Subnet |
| Statefulness | Stateful (response traffic is automatically allowed). | Stateless (inbound and outbound rules are evaluated independently). |
| Rule Scope | Specific to the instance. | Affects all instances in the subnet. |
| Rule Type | Allow rules only. | Both allow and deny rules. |
| Use Case | Control traffic at the instance level. | Add an additional layer of security at the subnet level. |
ACL (Access Control List) in AWS :
In simplest terms, Network ACLs (NACLs) are like firewalls that control traffic to and from subnets in your VPC. They act as a layer of security for your subnets by allowing or denying specific traffic based on rules you define.

How ACL Works
NACLs operate at the subnet level, meaning all instances (EC2) in the subnet are affected by the ACL rules.
NACLs evaluate inbound (traffic entering the subnet) and outbound (traffic leaving the subnet) traffic independently.
NACLs are stateless, which means:
- If an inbound rule allows traffic, you must explicitly allow the corresponding outbound traffic (and vice versa).
Key Characteristics of NACLs
Rule Evaluation:
NACLs use a numbered list of rules, starting from the lowest number.
Rules are evaluated in ascending order, and the first rule that matches the traffic is applied.
Allow and Deny Rules:
- Unlike Security Groups, which only allow traffic, NACLs can allow or deny traffic.
Default NACL:
Every VPC comes with a default NACL that allows all inbound and outbound traffic.
You can modify the default NACL or create custom NACLs.
Association:
- A subnet can be associated with only one NACL at a time, but one NACL can be associated with multiple subnets.
In my AWS account , I see :-


Interpretation:
Rule 100:
- Allows all types of traffic (any protocol, any port) from any source (
0.0.0.0/0means anywhere on the internet).
- Allows all types of traffic (any protocol, any port) from any source (
Default Deny Rule (*):
Denies all traffic by default that doesn’t match any preceding rule.
Every NACL has an implicit deny rule at the end, represented by
*.

Interpretation
Rule 100:
- Allows all outbound traffic (any type, any protocol, any port) from the subnet to any destination (
0.0.0.0/0means anywhere on the internet).
- Allows all outbound traffic (any type, any protocol, any port) from the subnet to any destination (
Default Deny Rule (*):
Denies any outbound traffic that does not match match any preceding rule.
This is an implicit deny rule that every NACL has by default, ensuring no traffic is allowed unless explicitly permitted.

Practical : Let me add some NACL rules and see the effect :
Currently , I’m easily able to do ssh from ip : 10.0.5.227 to ip: 10.0.131.154

Now , suppose I add an NACL inbound rule for the subnet associated with the instance ( 10.0.131.154 )to deny ssh from the ip : 10.0.5.227 :-


We see that now we can’t do ssh from ip : 10.0.5.227 to ip: 10.0.131.154

We know that in NACL , Rules are evaluated in ascending order . So if we change the Rule no. of the rule from 99 to 101 ; we see that now ssh can be done successfully (since more priority is given to rule 100 over 101) :-


AWS ENI - Elastic Network Interface :
When you’re working with physical servers on-premises, your system usually comes with a network interface card (NIC), like eth0. If needed, you can buy additional cards (like eth1) for better networking.
In AWS, EC2 instances also come with a default network card (like eth0,enX0 ,etc). This default interface allows your instance to communicate with your VPC. But if your requirements grow (e.g., multiple subnets, private/public separation, or failover needs), you can use Elastic Network Interfaces (ENIs) to add more virtual network cards to your instance.
Practical:
So, in one of my instance, by default “enX0” is there {on using ifconfig or ip addr commands} :

Now, if we create an ENI , we see :-
Step 1: Create an ENI
Log in to AWS Console → Go to EC2 Dashboard → Select Network Interfaces.
Click Create Network Interface.
Fill in the details:
Name tag:
my-secondary-eniSubnet: Choose a subnet in your VPC (e.g., public or private).
Private IP: Let AWS assign it automatically or specify one.
Security group: Assign a security group (e.g., allow SSH and HTTP).
Click Create Network Interface.
Step 2: Attach the ENI to an EC2 Instance
Go to Network Interfaces and select
my-secondary-eni.Click Actions → Attach.
Choose an EC2 instance from the dropdown and attach the ENI.


Step 3: Verify the ENI Inside the Instance
Connect into your instance
Check the attached network interfaces using ifconfig or ip addr commands:

You will see the primary interface (
enX0) and the newly attached ENI (e.g.,enX1).You can verify that the ip of enX0 “10.0.12.231/20” matches with the ip of
my-secondary-eni.
Step 4: Assign an Elastic IP to the ENI
Go to Elastic IPs in the AWS Console → Allocate a new EIP.
Select the EIP → Actions → Associate Elastic IP.
Attach it to the
my-secondary-eni.
Now, you can use this EIP to access your instance through the new ENI .
To access the instance, we can use the command : ssh -i <pem-file.pem> username@<Elastic IP>
Elastic Load Balancer (ELB) :
What is an ELB?
Think of an Elastic Load Balancer as a “traffic manager” for your servers. It distributes incoming traffic to multiple EC2 instances to:
Prevent any one instance from getting overloaded.
Improve availability and reliability of your application.
Why Use an ELB?
Automatically balances traffic between healthy servers.
Scales automatically with traffic.
Works across multiple Availability Zones (AZs) for high availability.
Types of Load Balancers:
Application Load Balancer (ALB):
Best for web apps.
Can route traffic based on content (e.g.,
/imagesto one server and/apito another).
Network Load Balancer (NLB):
Handles TCP/UDP traffic.
Super fast and best for high-performance, low-latency use cases.
Classic Load Balancer (CLB):
Older version, less flexible.
Works for both HTTP and TCP but lacks advanced features.
Gateway Load Balancer (GWLB):
- Ideal for third-party appliances like firewalls.
Objective:
Set up an ELB to distribute traffic to multiple EC2 instances.
Steps:
Launch EC2 Instances:
Launch 2 or more EC2 instances in the same or different AZs.
Install a web server (e.g., Apache or Nginx) and set up a basic webpage.
Example commands (on Ubuntu EC2 instances):
    sudo apt update
    sudo apt install apache2 -y
    echo "Hello from Instance 1" | sudo tee /var/www/html/index.html
    sudo systemctl start apache2
Similarly, do like: echo "Hello from Instance 2" and, echo "Hello from Instance 3" in the remaining instances. Suppose, I have 3 instances :

Create an ELB:
Go to the EC2 Dashboard → Load Balancers → Create Load Balancer.
Choose Application Load Balancer (ALB).
Set up:
Name:
my-albScheme: Internet-facing (for public access).
Listeners: HTTP (port 80).


Register Targets:
Under the “Target Group” section, add your EC2 instances.
Save and launch the ALB.


Test the Setup:
Copy the DNS name of the ALB from the console.

Open it in a browser. You should see traffic balancing between the instances (refresh the page to see different responses. You’ll see responses like :- Hello from Instance 1 , Hello from Instance 2 , Hello from Instance 3 ; alternatively ).
ELB Healthy/Unhealthy LAB
What are Health Checks?
ELB checks the health of targets (EC2 instances). If an instance is unhealthy, traffic won’t be sent to it.
Steps:
Modify Health Check Settings:
Go to the Target Group in the EC2 Console → Health Checks → Edit.
Set:
Protocol: HTTP.
Path:
/index.html.Healthy Threshold: Number of successful checks before marking it healthy.
Unhealthy Threshold: Number of failed checks before marking it unhealthy.

Simulate Unhealthy Instances:
Stop the Apache server on one EC2 instance:
sudo systemctl stop apache2

Observe:
Go to the Target Group → Targets → Check Health Status.
The stopped instance will show as Unhealthy.

ELB Connection Draining
What is Connection Draining?
Allows in-flight requests to complete before terminating or de-registering an instance.

Steps to Find Deregistration Delay Timeout
Go to the Target Group:
Open the AWS Management Console.
Navigate to the EC2 Dashboard.
Scroll down in the left-hand menu and click on Target Groups under the Load Balancing section.
Select Your Target Group:
Look for the Target Group that is associated with your Application Load Balancer (ALB).
Click on the Target Group Name to view its details.
Edit Attributes:
In the Target Group Details section, locate the Attributes tab or section.
Click on Edit Attributes or the equivalent button.
Find Deregistration Delay:
In the Attributes section, you should see an option for Deregistration delay timeout.
The default value is 300 seconds (5 minutes).
Change it to your desired value (e.g., 60 seconds).

Save Changes:
After modifying the deregistration delay, click Save or Update.
Now, if we deregister an instance from the target group , it will take 60 seconds in draining :

After about 60 seconds , it gets removed :

Real-Life Example for understanding its benefits :
Imagine you're running a web application with a target group of EC2 instances. One of the EC2 instances needs to be taken offline for maintenance. Without a deregistration delay:
- Ongoing requests being served by that instance would fail, leading to errors for end-users.
With a deregistration delay set (e.g., 60 seconds):
- The instance continues handling active requests for the next 60 seconds while the load balancer stops sending new requests to it. This ensures users’ sessions are not abruptly interrupted.
How to Map ELB with Domain Name Using AWS Route 53
Get the ELB DNS Name:
- Go to the EC2 Console → Load Balancers → Select your ELB → Copy the DNS name.
Set Up a Hosted Zone in Route 53:
Open Route 53 → Hosted Zones → Create Hosted Zone.
Enter your domain name and save.

Create a Record:
Inside your hosted zone, click “Create Record.”

Set:
Type: A or Alias.
Value: Paste the ELB DNS name.

Test the Setup:
Wait for the DNS to propagate.
Access your domain; it should route traffic via the ELB.
So now , if I visit www.kishaloykarchowdhury.com , I can see responses like :- Hello from Instance 1 , Hello from Instance 2 , Hello from Instance 3 ; alternatively on refreshing.
How to Add SSL Certificate to EC2 Load Balancer
Get an SSL Certificate:
Use AWS Certificate Manager (ACM) → Request a Public Certificate.
Verify your domain via email or DNS.
Attach the SSL to ELB:
Go to the EC2 Console → Load Balancers → Select your ALB.
Edit Listeners → Add HTTPS (443).
Select the SSL certificate from ACM.
Test:
- Access the ELB DNS name using
https://. (earlier it was just http:// ; not secured)
- Access the ELB DNS name using
How to View ELB Logs
What are ELB Logs?
Detailed logs of all requests made to your ELB. Useful for debugging and monitoring.
Steps:
Enable Access Logs:
Go to the EC2 Console → Load Balancers → Attributes → Enable Access Logs.
Set:
S3 Bucket: Where logs will be stored.
Prefix: Optional folder name.

Access Logs:
- Go to the S3 bucket and check for log files.
NOTE : 1) The bucket shall be in the same region as that of the ELB.

- Also, the s3 bucket permission must allow the access logs monitoring.

AWS Auto Scaling
What is AWS Auto Scaling?
AWS Auto Scaling is like having an automatic helper for your servers. It makes sure you have just the right number of servers running at any given time. Not too many (so you save money) and not too few (so your app doesn’t slow down).
Basic Concept with an Example
Imagine you run an online store. During big sales (like Diwali), your website gets a lot of traffic. At other times, like midnight on a regular day, very few people visit. AWS Auto Scaling automatically adjusts the number of servers to handle the traffic.
When traffic increases, it adds more servers (scales out).
When traffic decreases, it reduces the number of servers (scales in).
Key Terms to Understand
Min Instances: The minimum number of servers that should always be running, even when traffic is low.
Example: Setmin = 1for your store to stay online at all times.Max Instances: The maximum number of servers that can run at once.
Example: Setmax = 10to handle heavy traffic during sales.Desired Instances: The ideal number of servers AWS tries to maintain based on traffic.
Example: Setdesired = 3, and AWS will aim to keep 3 servers running unless scaling is triggered.
Scaling Plans
Dynamic Scaling: The system adjusts automatically based on real-time traffic.
Example: Add a new server if the CPU usage goes above 80% or remove a server if it drops below 30%.
Use Case: A sudden increase in users during lunch hours at a restaurant ordering app.
Manual Scaling: You manually tell AWS to increase or decrease the number of servers.
Example: You know a live concert is starting, so you manually add 5 servers before the event.
Use Case: When you can predict traffic spikes in advance.
Scheduled Scaling: Set scaling rules based on a predictable schedule.
Example: Add 5 servers every day at 8 AM and remove them at 10 PM when office work hours are over.
Use Case: A news app that knows traffic will peak in the morning and evening.
Steps To create Auto Scaling Launch Template
Step 1: Click on the All Services.
Step 2: Click on the EC2(Elastic Cloud Computing).
Step 3: Scroll Down and click on the Launch Templates and click on the Create launch template
Step 4: Type the Template name.
Step 5: Select the Amazon Machine Image.
Step 6: Select the Instance Type and Key pair.
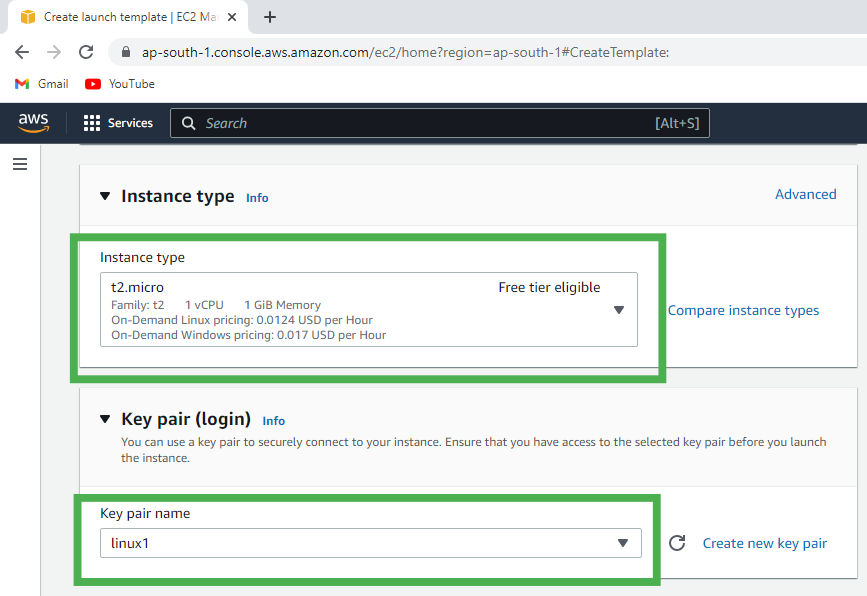
Step 7: Select the Security Group or Create the new one.
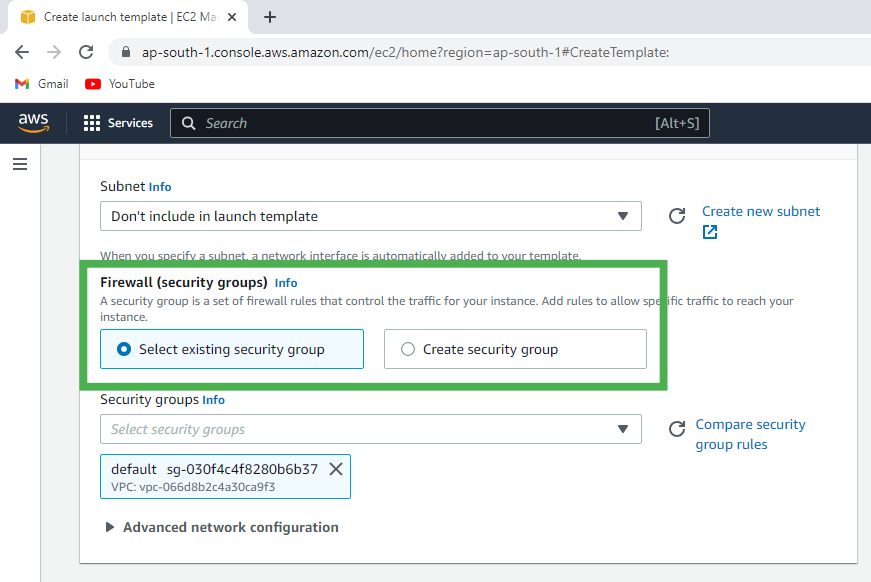
Step 8: Click on the Create Launch Template.
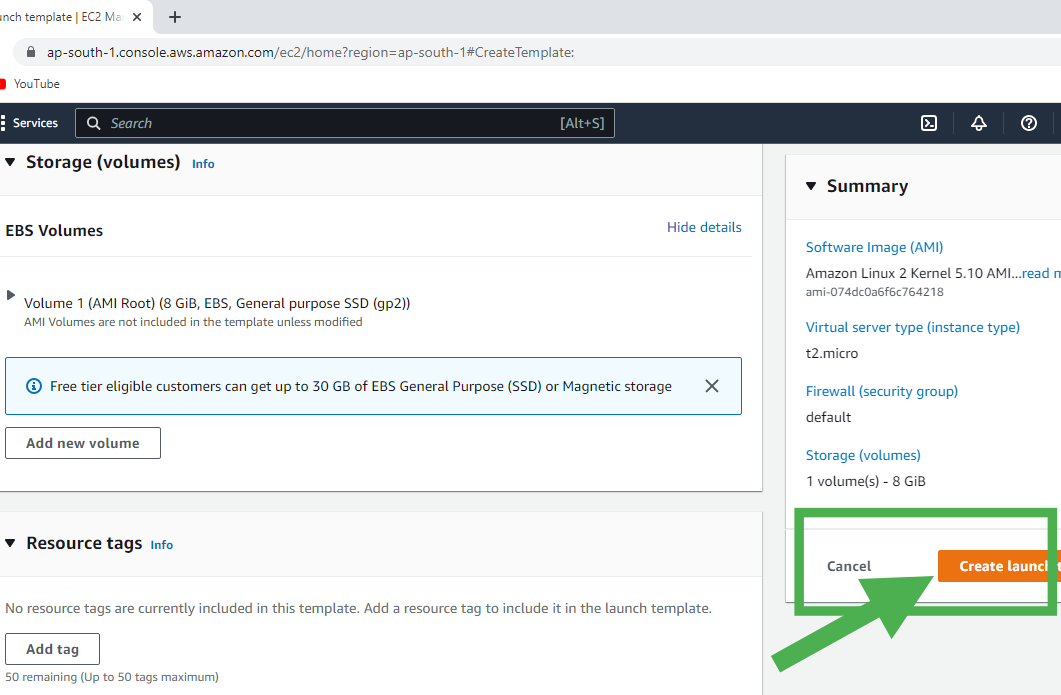
Step 9: Now you can see the template is created. Now, scroll down and click on the Auto Scaling Groups.
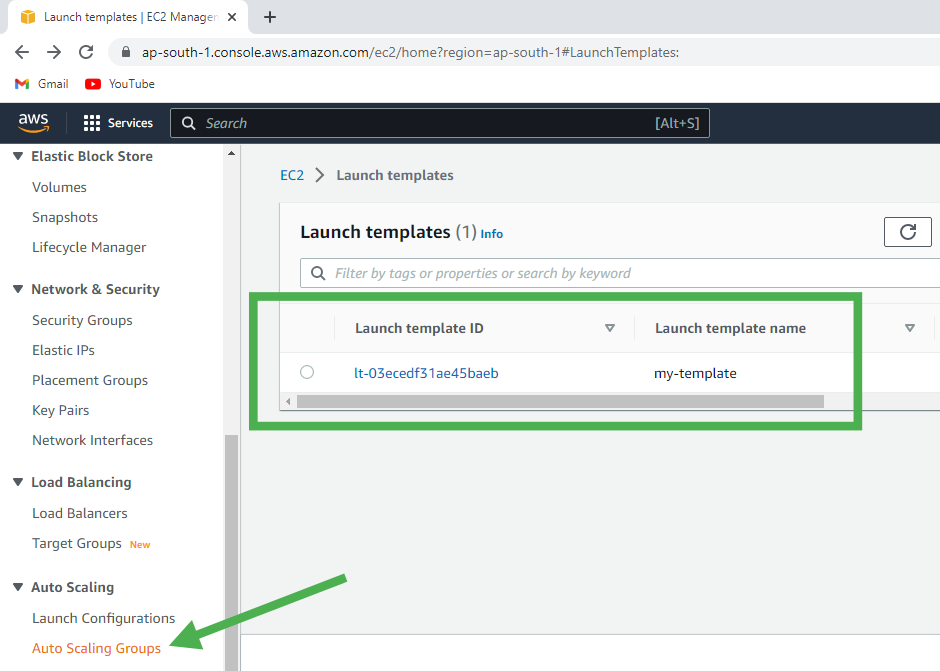
Create An Auto Scaling Group Using a Launch Template
Step 1: Click on the Create Auto Scaling group.
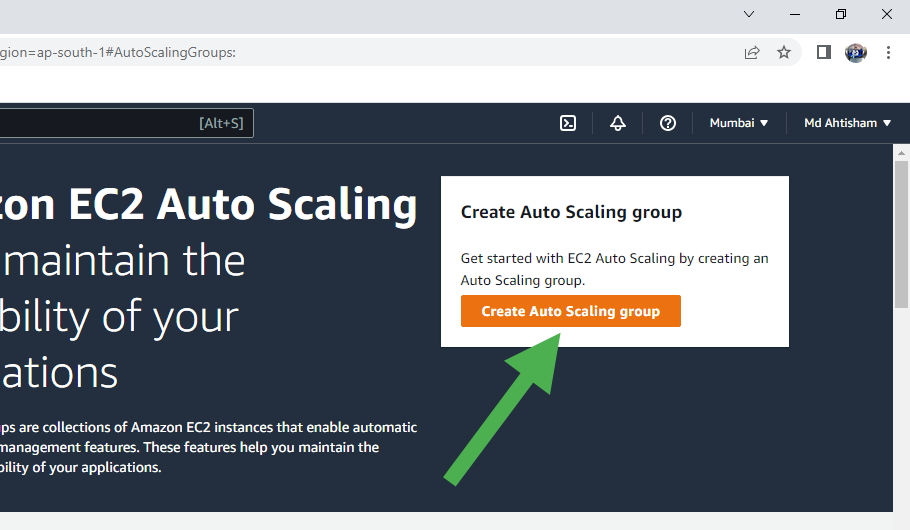
Step 2: Type the Auto Scaling group name.
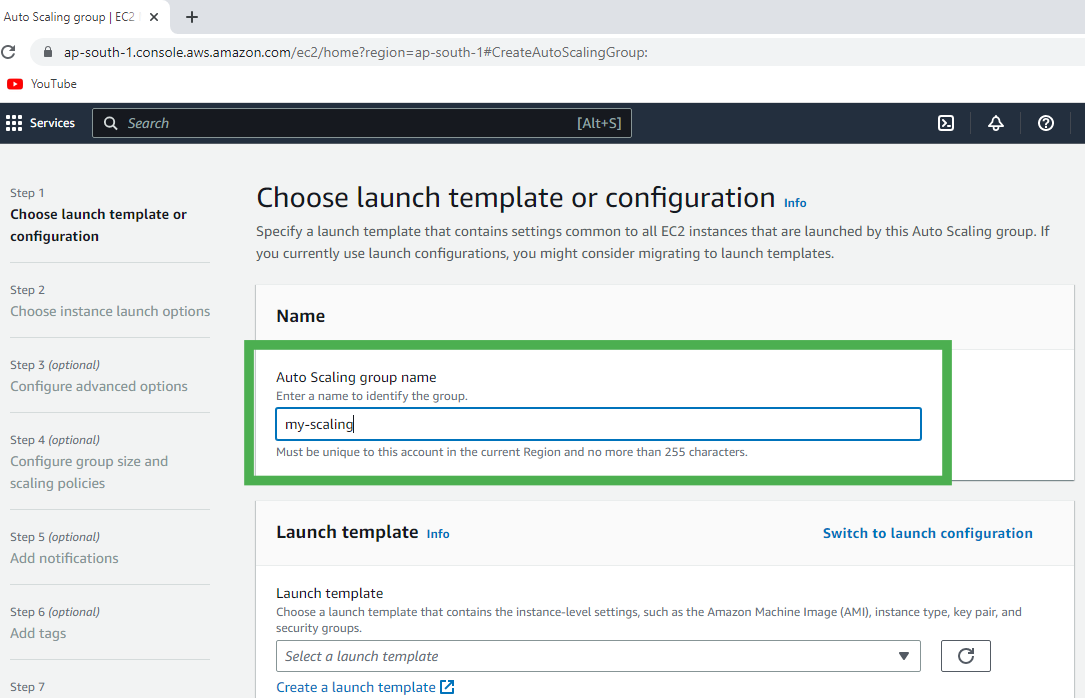
Step 3: Select your Template.
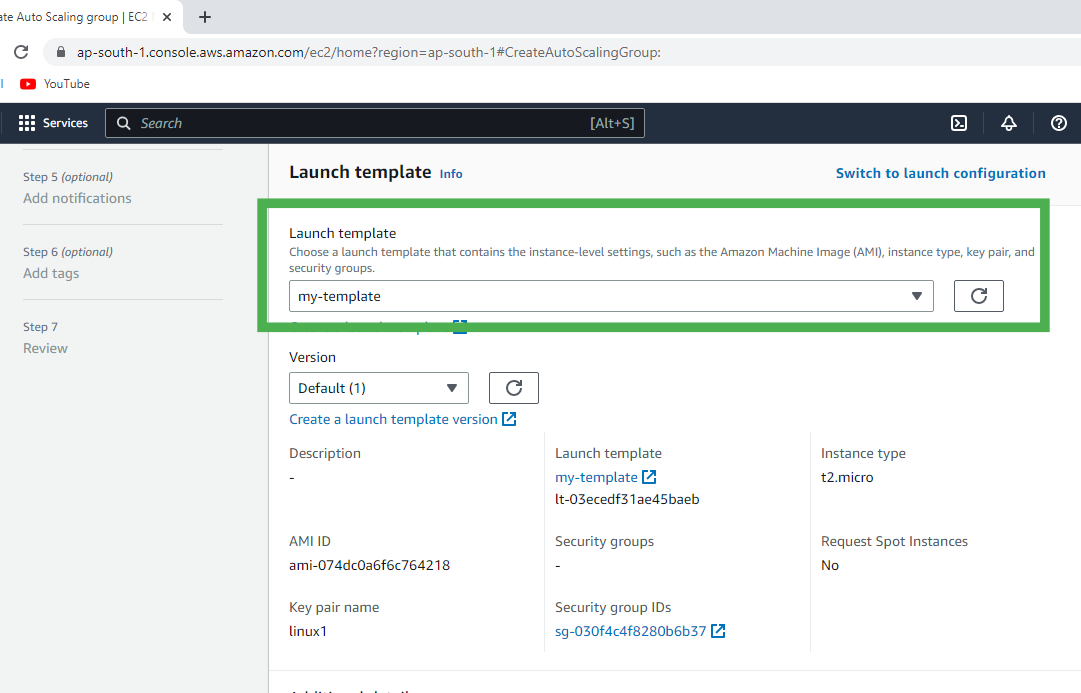
Step 4: Select the VPC or go with the default VPC and also select the Availability zone.
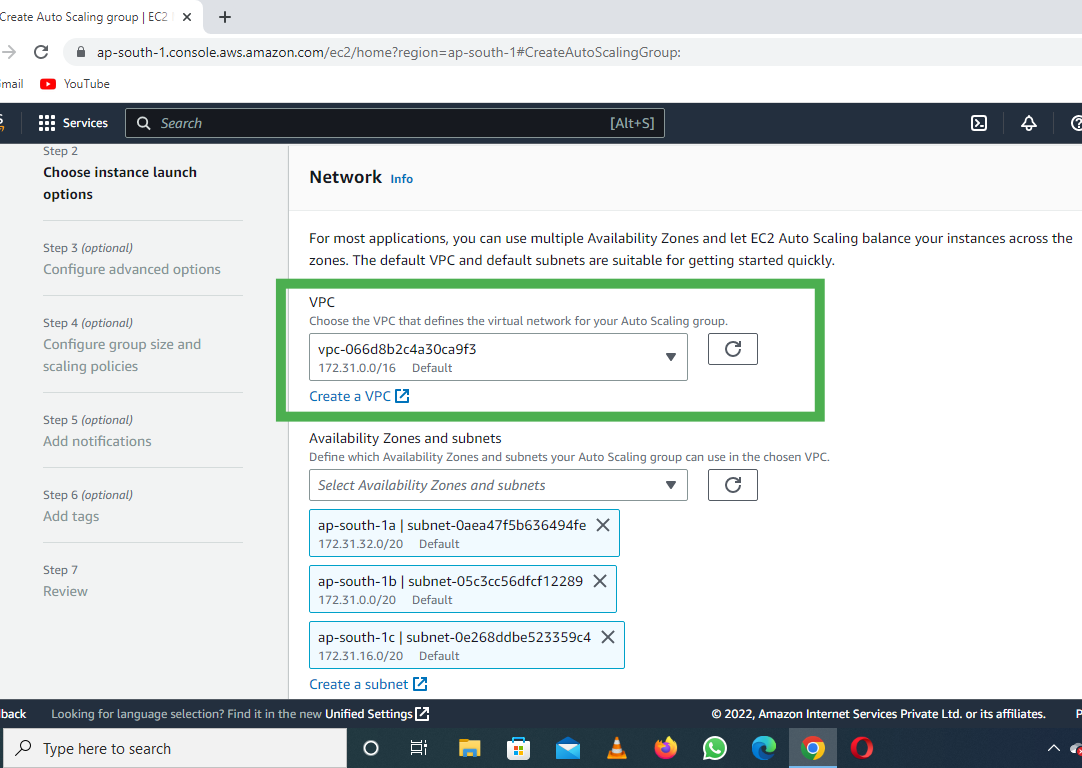
Step 5: Configure the Group size and Scaling policies.
Select as per your requirement:
Desired: 4
Minimum: 4
Maximum: 8
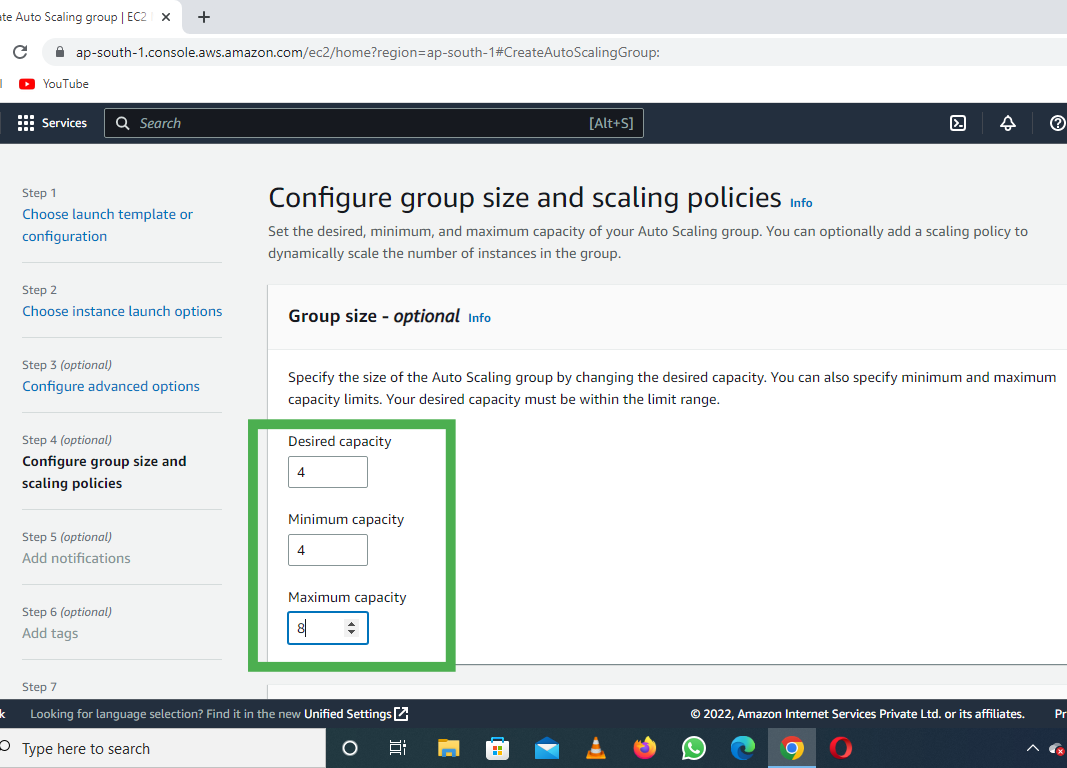
Step 6: Select the Target tracking scaling policy.
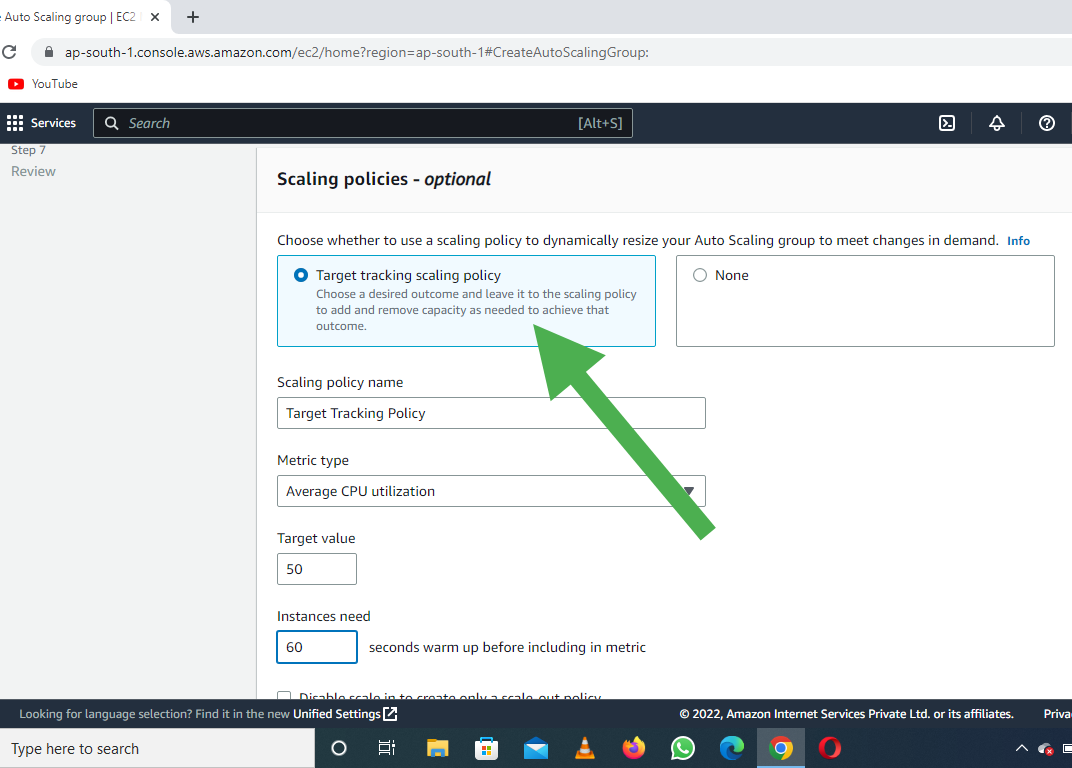
Step 7: Click on the Create Auto Scaling Group.
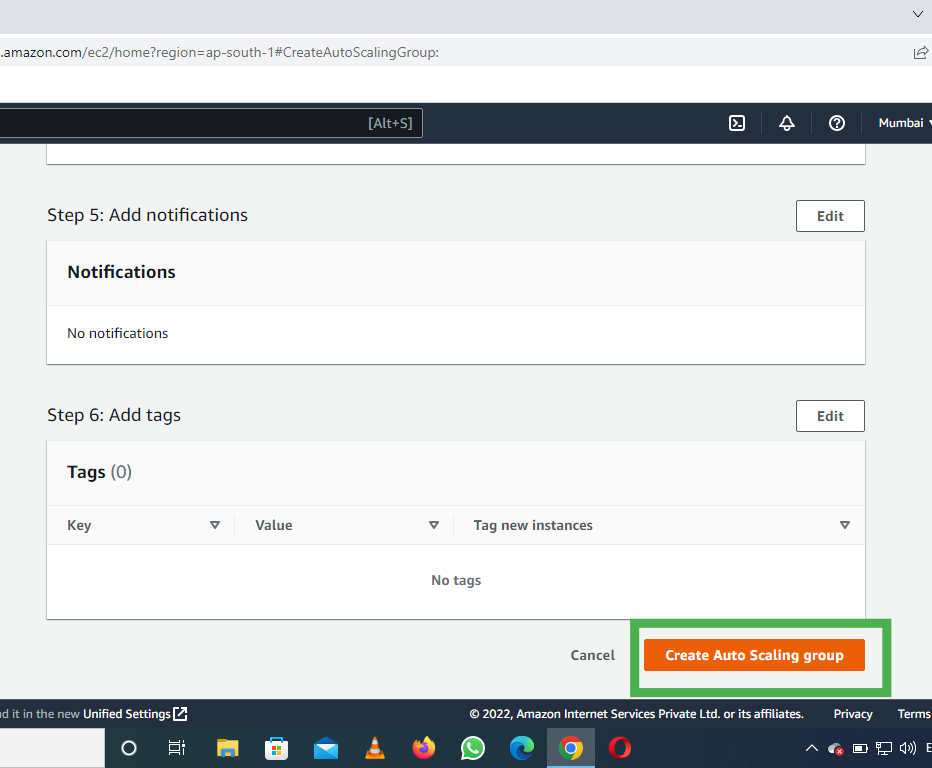
- Now you can see the Auto Scaling is creating and it is also creating the desired state of the EC2 Instance
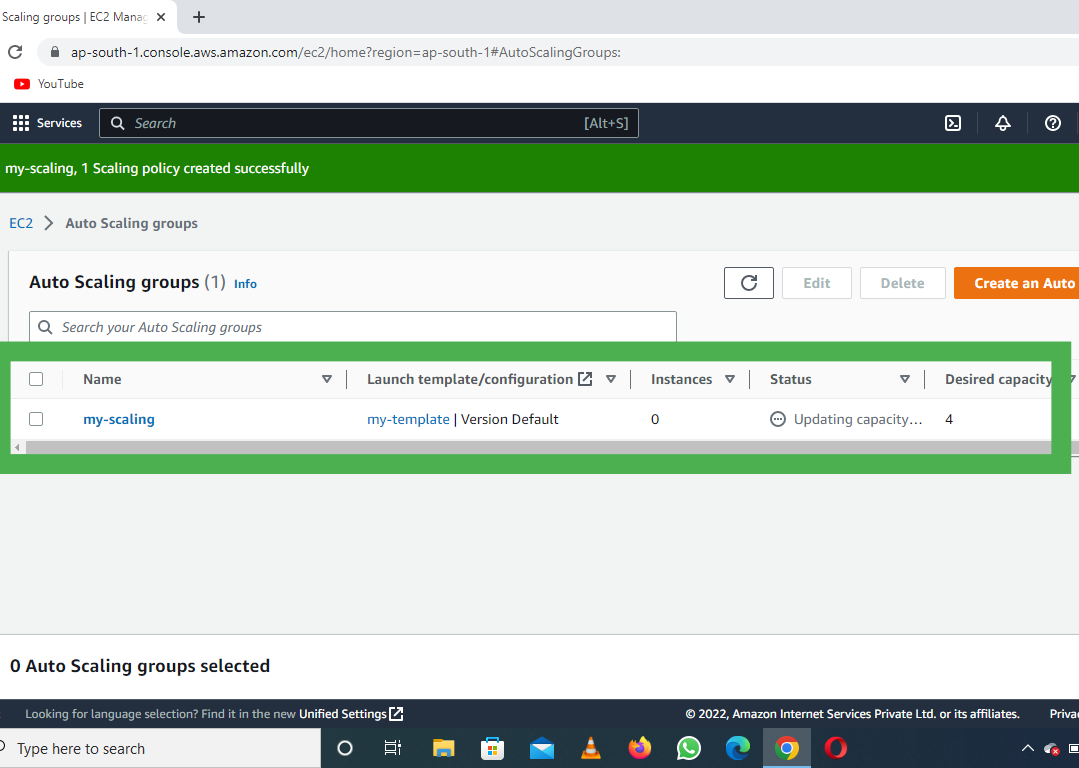
- We selected the Desired state equal to 4 and you can see the 4 Instance is Running
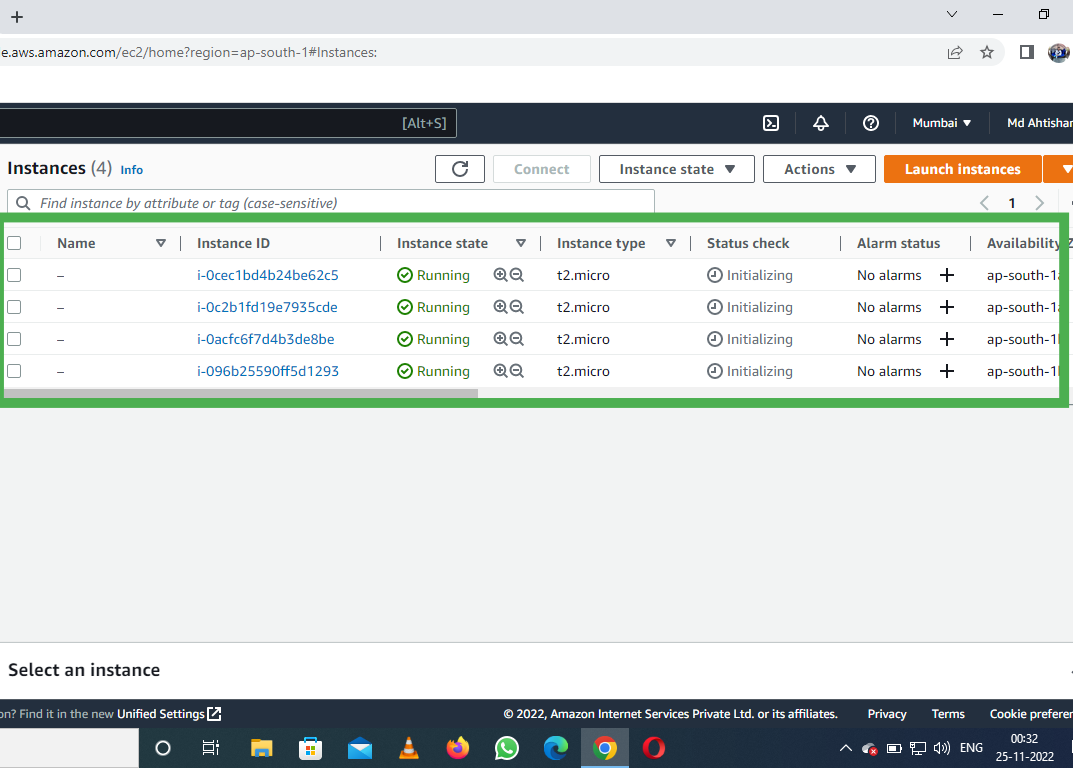
AWS CloudWatch:
What is AWS CloudWatch?
AWS CloudWatch is like the "eyes and ears" of your AWS resources. It monitors and tracks everything happening in your cloud environment, from how busy your servers are to whether your application is running smoothly.
It’s a real-time monitoring tool that gives you reports, creates alerts, and even automates actions based on specific conditions.
How to Understand It?
Imagine you own a factory.
CloudWatch = Your control room.
It monitors machines (servers), workers (applications), and energy usage (network traffic).
It sends you an alert if something breaks, is overworked, or not working as expected.
Key Features of AWS CloudWatch
Monitoring Metrics: Metrics are numbers that show how your AWS resources are performing.
Example:EC2 Instance CPU Usage: Tells you how busy your server is.
Disk Space Usage: Tells you if your storage is running out.
Request Count: Tracks how many requests your app is receiving.
Logs: CloudWatch can collect and store logs from your applications.
Example: If your app crashes, CloudWatch Logs can help you figure out why by storing error messages.Alarms: CloudWatch can alert you when something unusual happens.
Example:If CPU usage > 80% for 5 minutes, send a text message (SMS) or email.
If storage is almost full, notify you to take action.
Dashboards: Visualize all your data in one place.
Example: See CPU, memory, and request counts for all your servers in a single graph.Automation with Actions: You can make CloudWatch automatically respond to certain conditions.
Example:If an EC2 instance is overworked, automatically start a new instance (Auto Scaling).
If your application stops, restart it automatically.
Draw Backs of Amazon CloudWatch:
Cloud Watch can be expensive, especially for large-scale monitoring and logging needs.
Cloud Watch may not be able to handle large amounts of log data, especially during spikes in usage, making it difficult to maintain a consistent level of monitoring and logging.
The monitoring and logging processes of CloudWatch can consume significant system resources, impacting the overall performance of an application.
Integrating CloudWatch with other AWS services and third-party tools can be challenging.
Setting up and managing CloudWatch can be complex sometimes.
Practical:
Step 1: Let us assume that you have already launched an instance with the name tag ‘instance’.

Step 2: Go to SNS topic dashboard and click on create a topic. {SNS: Simple Notification Service**}**
Step 3: You will be directed to this dashboard. Now specify the name and display name.

Step 4: Scroll down and click on create the topic.
Step 5: The SNS topic is created successfully.

Step 6: Go to the SNS topic dashboard and visit the topic.
Step 7: Under the subscriptions section, Click on Create subscription.

Step 8: Select Email as protocol and specify the email address of subscribers in Endpoint. Click on create the subscription. Now Go to the mailbox of the specified email id and click on Subscription confirmed

.
Step 9: Go to the CloudWatch dashboard on the AWS management console. Click on Metrics in the left pane.

Step 10: In All metrics section click on EC2. Click on Per-instance metrics. Select the instance you launched. Go to Graphed metrics, click on the bell icon.

Step 11: This dashboard shows the components of Amazon CloudWatch such as Namespace, Metric Name, Statistics, etc. Select the greater threshold. Also, specify the amount( i.e. 80 ) of the threshold value. Click on Next.

Step 12: Click on Select an existing SNS topic, also mention the name of the SNS topic you created now.

Step 13: Specify the name of alarm and description which is completely optional. Click on Next and then click on Create alarm.

Step 14: The alarm is successfully created.

To simulate CPU utilization greater than 80% on an AWS EC2 instance, you can intentionally run CPU-intensive tasks. Here's how you can do it:
For Amazon Linux / Amazon Linux 2:
sudo yum update -y
sudo yum install -y stress
For Ubuntu/Debian:
sudo apt update
sudo apt install -y stress
Run the Stress Command
The stress command can be used to simulate CPU load. Use the following command:
stress --cpu 1 --timeout 300
--cpu 1: Simulates load on 1 CPU core.--timeout 300: Runs the stress test for 300 seconds (5 minutes).
RESULT :


Amazon RDS (Relational Database Service):
It is a fully managed service by AWS to deploy and scale relation database systems in the cloud. Amazon RDS supports a lot of relation database engines such as MYSQL, PostgreSQL, Oracle, SQL Server, etc. Amazon RDS comes with a lot of handy features such as encryption, scaling, snapshotting, disaster recovery, etc.

Single-AZ Deployment :
In Single-AZ deployment, the database instance is hosted in a single Availability Zone (AZ). There is no standby replica in another AZ.
Use Case: Suitable for development and test environments where downtime is acceptable. Example: A small business running a web application with low traffic that doesn’t require high availability.
Practical Scenario: Suppose you have a blog site hosted on AWS with RDS MySQL in a Single-AZ setup. If the AZ where the RDS is deployed becomes unavailable due to hardware failure or maintenance, your application will experience downtime until the issue is resolved or you manually restore a backup.
Pros: Lower cost compared to Multi-AZ. Simple to set up for non-critical use cases.
Cons: No automatic failover. Vulnerable to AZ-specific failures.
Multi-AZ Deployment :
In Multi-AZ deployment, AWS creates a primary instance in one AZ and a standby replica in a different AZ. The standby is continuously synchronized with the primary instance. In case of failure (e.g., hardware, network, or AZ outage), AWS automatically promotes the standby to become the new primary with minimal downtime.
Use Case: Ideal for production applications where high availability and fault tolerance are required. Example: An e-commerce platform with users worldwide that cannot afford downtime.
Practical Scenario: Consider an online shopping site that uses RDS PostgreSQL in Multi-AZ mode. If the primary AZ faces an outage, the application will automatically switch to the standby replica in another AZ. The failover is seamless, and customers won’t experience downtime.
Pros: Automatic failover in case of an outage. High availability and improved durability.
Cons: Higher cost than Single-AZ deployment. Slightly higher write latency due to replication.
Read Replicas Deployment :
RDS Read Replicas are read-only copies of your primary database instance.
How It Works:
Replication is asynchronous: Updates on the primary instance are asynchronously copied to the read replicas. This may lead to a slight lag between the primary and the replicas.
Replicas can be deployed:
In the same AZ as the primary.
In a different AZ for better durability.
Across regions to reduce latency for global users.
You can have up to 15 read replicas per primary instance.
Replicas are independent and can be promoted to standalone databases when needed.
Limitations:
Read replicas cannot handle write operations (no INSERT, UPDATE, or DELETE queries).
The replication is not real-time, so there might be a delay (replication lag).
Use Case for Read Replicas
Scenario:
Imagine you run a global video streaming platform like Netflix. Most of the traffic comes from users reading data like video metadata, user profiles, and playback history.
You set up multiple read replicas across regions to distribute read traffic geographically, reducing latency for users worldwide.
Example:
North America users are directed to a replica in the US-East region.
Europe users are directed to a replica in the Frankfurt region.
The primary database, however, handles all write operations like user data updates or billing records.
NOTE: 1)Synchronous Replication (Multi-AZ):
Changes (writes) to the primary database are instantly copied to the standby instance. This ensures both are always in sync with no data loss, but it slightly increases latency for writes.
2)Asynchronous Replication (Read Replicas):
Changes (writes) to the primary database are copied to replicas after they are written. This can cause a lag between the primary and replicas, but it allows faster primary performance.
Now, let’s start to know how to make the database on RDS of AWS :
Step 1:
First open your account on the AWS (Amazon Web Service), as your main screen is open then you have to go to the services, and at the bottom, there is an option of the database, here we have the RDS amazon relation database services and then click on the RDS.
Step 2:
After clicking on the RDS you have to click on the launch instance it will launch your database instance on the cloud.

Step 3:
Then the page given below is open you have to select your database from the given database on it.
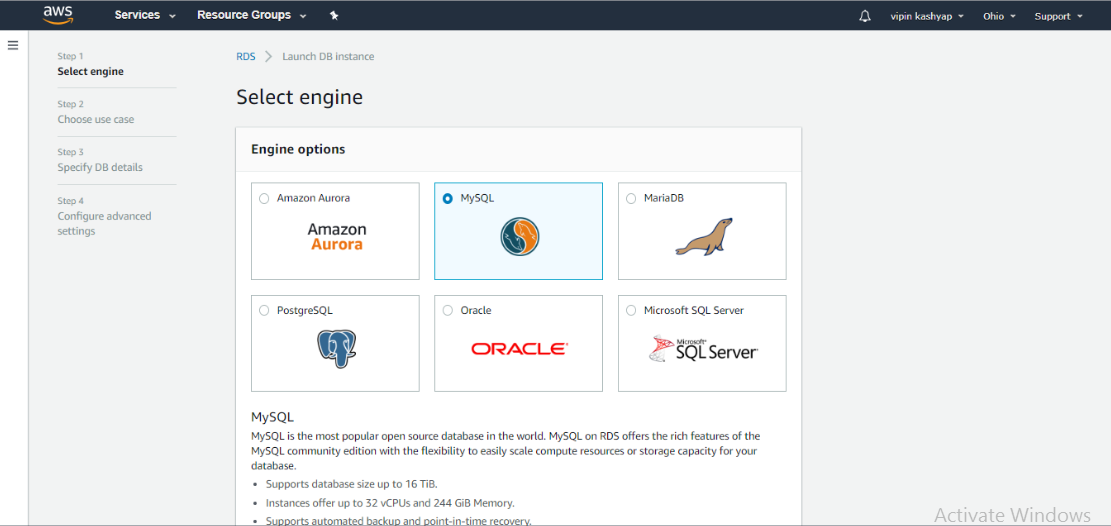
**
Step 4:**
Click on the free trial.
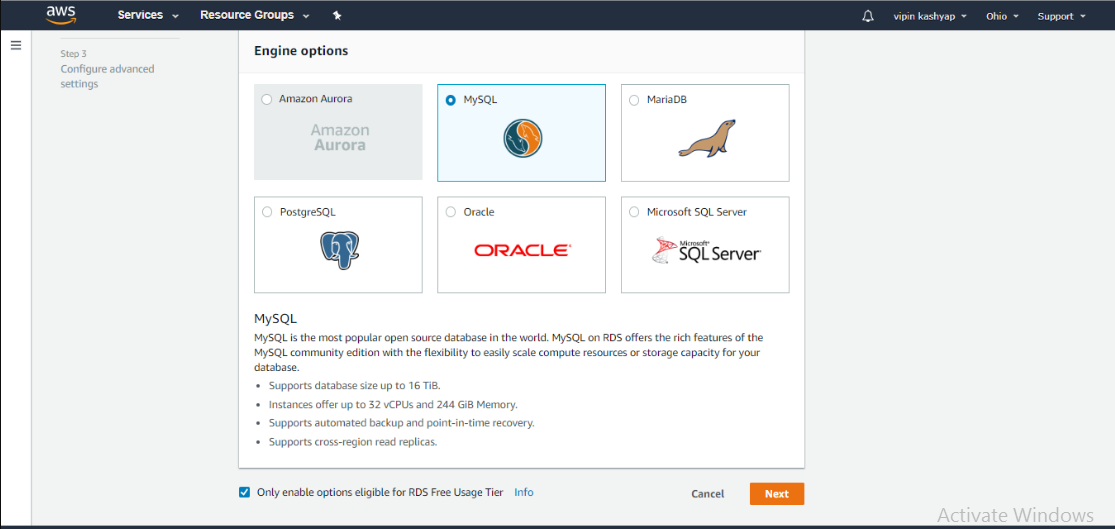
Step 5:
After that choose your case and click on next.
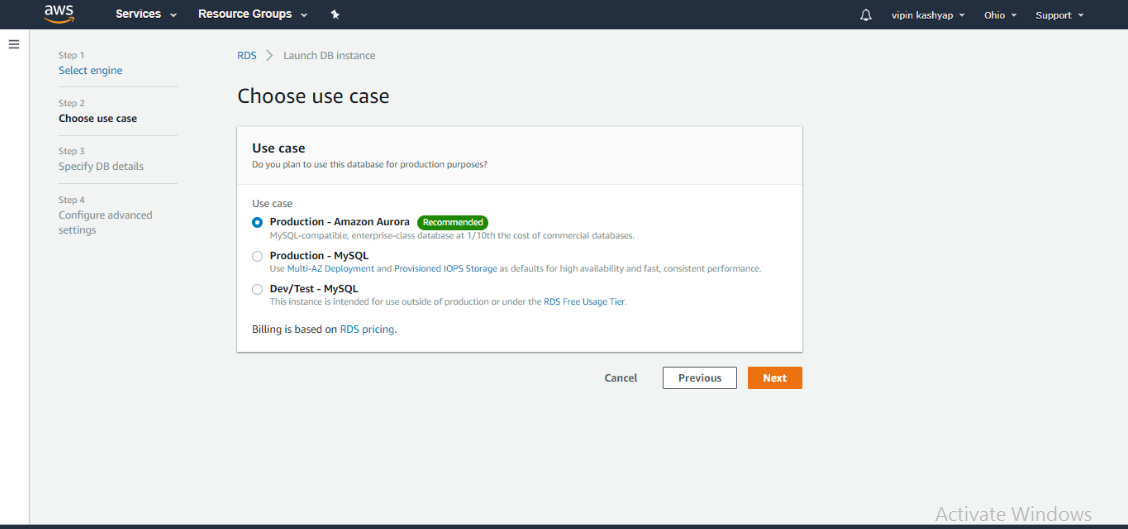
Step 6:
In the next step, you have to specify the database details. In this you have to fill the database name and set the password for the database.
After scrolling down, you have an entity to fill and there you have to fill the database name and the database password and then click on next.
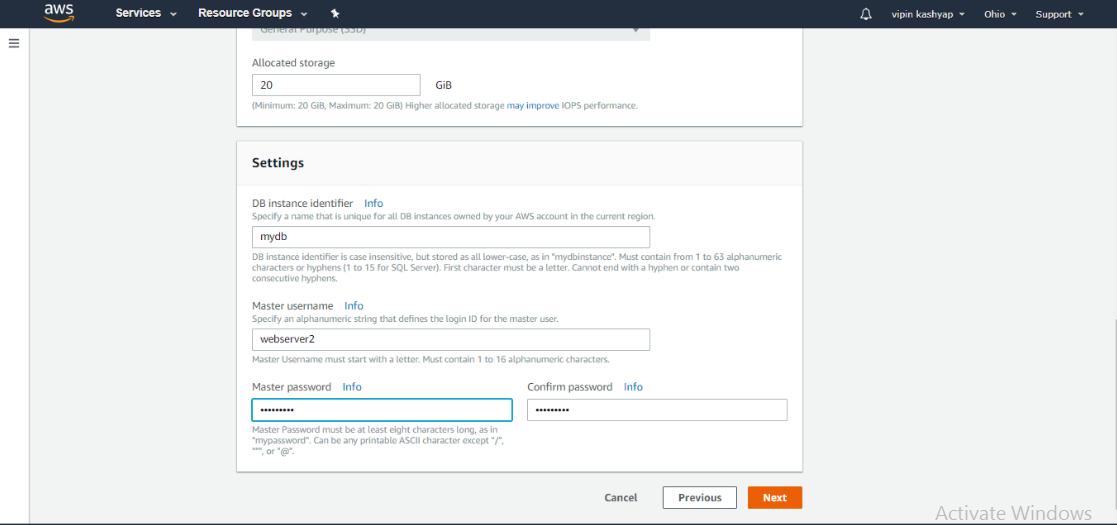
Step 7:
After that we have the configure advance setting (in this we don’t have to do anything leave it as is it) and scroll down there you get launch instance and click on launch instance.
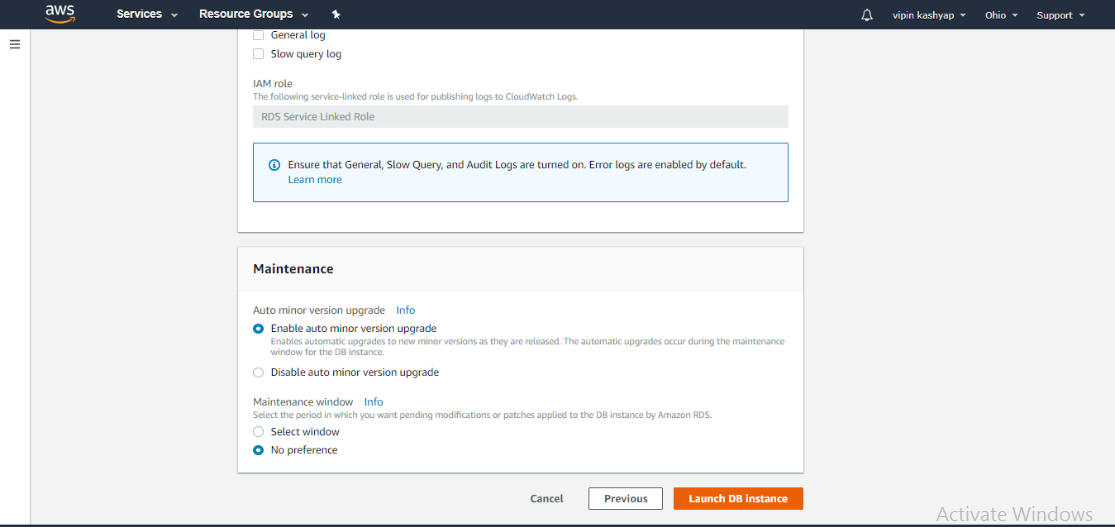
Relation between Templates and Availability and durability :


Nowadays, we also have Multi-AZ DB Cluster in AWS RDS.
What is a Multi-AZ DB Cluster?
It's a high-availability deployment mode for Amazon RDS.
It uses three separate Availability Zones (data centers) in the same region to ensure redundancy and availability.
How It Works:
1 Writer Instance (Primary):
Handles all read and write operations.
It is the main database instance.
2 Reader Instances (Replicas):
They are read-only replicas of the writer instance.
These replicas are always kept almost in sync with the writer using semi-synchronous replication (small delay for safety).
They can handle read traffic to reduce the load on the primary instance.
Automatic Failover:
If the writer fails, one of the reader instances is promoted to become the new writer.
This ensures minimal downtime and no data loss.
Why Semi-Synchronous Replication?
Data written to the writer is immediately replicated to at least one reader instance, ensuring durability.
The second reader is updated slightly later (asynchronously), which helps balance speed and reliability.
What Is Amazon Route 53?
Amazon Route 53 is a highly available and scalable cloud Domain Name System (DNS) web service. It is designed for developers and corporations to route the end users to Internet applications by translating human-readable names like example.com into the numeric IP addresses like 192.0.1.1 that computers use to connect.
Scenario:
You want to host a website (www.example.com) on an EC2 instance using Route 53.
Step-by-Step Implementation:
Register a Domain:
Go to Route 53 → Domain Registration.
Register a domain like
example.com.
Create a Hosted Zone:
In Route 53, create a public hosted zone for
example.com.Route 53 will provide Name Server (NS) records for the hosted zone.
Point Domain to Route 53:
- Update your domain's DNS settings with the Route 53 NS records provided during hosted zone creation.
Create EC2 Instance:
- Launch an EC2 instance with a web server (e.g., Apache or Nginx) and deploy your website.
Set Up Record Sets:
In Route 53, create an A Record:
Name:
www.example.comType: A (IPv4)
Value: Public IP of your EC2 instance.
Test the Website:
- Open
www.example.comin a browser. Route 53 will resolve the domain to the EC2 instance's IP, and your website will load.
- Open
The following are the DNS record types that are supported in Amazon Route53:
A Record: Maps a domain or subdomain to an IPv4 address.
AAAA Record: Maps a domain or subdomain to an IPv6 address.
CNAME Record: Creates an alias for a domain name pointing to another domain.
MX Record: Specifies the mail server responsible for receiving emails for a domain.
AWS Elastic Beanstalk:
What is AWS Elastic Beanstalk?
AWS Elastic Beanstalk is a managed service that makes it super easy to deploy and manage applications without worrying about the underlying infrastructure. You just upload your code, and Elastic Beanstalk takes care of everything else, like servers, storage, scaling, and load balancing.
Example:
Imagine you’re a baker. Normally, you’d need to:
Buy ingredients.
Set up your kitchen.
Preheat the oven.
Bake and serve the cake.
But with Elastic Beanstalk, you simply give them the recipe (your app's code), and they handle the entire baking process for you:
Set up the kitchen (infrastructure).
Preheat the oven (configure the server).
Bake the cake (deploy your app).
Serve the cake (make it accessible to users).
You can focus solely on creating the recipe (writing your app's code), while AWS handles the rest.
How Does It Work?
Upload Your Code:
Write your application in a supported language (e.g., Python, Node.js, Java).
Upload it (as a ZIP file) via the Elastic Beanstalk console, CLI, or IDE.
Elastic Beanstalk Provisions Resources:
It automatically creates all the necessary resources, like:
EC2 instances (servers).
Load balancers (for distributing traffic).
Auto-scaling groups (to handle traffic spikes).
Manage Your App:
Monitor app performance.
Easily scale or update the app.
Pay-As-You-Go:
- You only pay for the underlying resources (like EC2 or RDS), not the Beanstalk service itself.
Key Benefits of Elastic Beanstalk:
Simplifies Deployment: No need to manually set up servers or configure infrastructure.
Scalability: Automatically handles traffic spikes.
Cost-Efficient: Only pay for the AWS resources used.
Integrated Monitoring: Built-in dashboards to track app performance.
Customizable: You can tweak settings if needed (e.g., instance type, environment variables).
Practical: How to Deploy an Application Using Elastic Beanstalk
Step 1: Visit the AWS Console and type “Elastic Beanstalk” into the search bar. After selecting Elastic Beanstalk from the drop-down menu below, you will be taken to the Elastic Beanstalk page where you can click “Create application” to launch a sample application using Elastic Beanstalk. As shown in the screenshots
.webp)
.webp)
Step 3: In this step, we are going to configure the necessary Application information like Name, and key-value pairs and select the platform in which the language the application is developed has to be deployed, the platform branch, platform version, and Application code.
Example: In this example, we are going to deploy the sample Java application which is provided by AWS itself select all the options as shown in the below screenshot.
If you want to deploy your own application code then select the option “Upload your code” It needs to be in form of a ZIP or WAR file which is compulsory and needs to be in your local computer or S3 bucket and a version label which your going to provide must be unique.
.webp)
.webp)
Step 4: In this step, We do not need to do anything AWS Elastic Beanstalk will take care of the resource required to deploy the web application like EC2 instance, Security Group, S3 bucket, Environment, Load Balancer Listener, CloudWatch Alarms, Auto Scaling Group, Elastic Load Balancer (ELB).
As shown in the image below

Step 5: In the screenshot below, under “Gfgapplication-env,” we can see the URL of the application, which can be accessed through the internet. We can also see that the health is marked in “green color, OK,” indicating that our application has been successfully deployed and has not encountered any difficulties. The resources or full architecture developed by AWS Beanstalk to deploy our application are visible in the Recent Events section.
.webp)
Step 6: The very last and most important step requires us to use the URL provided by the Elastic Beanstalk to visit our Java web application. as seen in the image below.
.webp)
AWS CloudFront
What is AWS CloudFront?
AWS CloudFront is a Content Delivery Network (CDN) service that helps deliver your website, videos, or files to users faster and securely by caching content at servers close to their location. It reduces latency and improves performance.
Simplest Example
Imagine you have a popular YouTube-like video platform hosted in Mumbai, but your users are spread all over the world. When someone in New York tries to watch a video, it takes longer because the request has to travel to Mumbai and back.
With CloudFront:
Your video gets cached at servers in New York (or nearby locations), called Edge Locations.
The next time a user in New York tries to watch the video, it’s served directly from the nearby server, making it much faster.
How Does CloudFront Work?
You Create a CloudFront Distribution:
- Tell CloudFront where your content is stored (e.g., S3 bucket or EC2 instance).
Content is Cached at Edge Locations:
- CloudFront caches your content at Edge Locations worldwide.
User Request:
- When a user requests your content, CloudFront routes the request to the nearest Edge Location.
Faster Delivery:
If the content is already cached, it’s delivered instantly.
If not, CloudFront fetches it from the original server, caches it, and delivers it.
PRACTICAL : See this tutorial : https://www.youtube.com/watch?v=no3HOmQWHNw
AWS WorkMail:
What is AWS WorkMail?
AWS WorkMail is a secure business email service that allows you to send, receive, and manage emails just like Gmail or Outlook, but hosted on AWS. It is designed for businesses that want custom domain emails (e.g., you@yourcompany.com) with added security and easy integration with AWS services.
Example:
Think of AWS WorkMail like a private Gmail for your company.
Without WorkMail: Employees might use personal Gmail accounts (e.g.,
john123@gmail.com) for work, which is unprofessional.With WorkMail: Your company can have branded emails like
john@yourcompany.com, improving professionalism and security.
Scenario:
You start a small tech startup and want professional emails like support@mytechstartup.com instead of using free services like Gmail.
Solution Using AWS WorkMail:
Register a domain (
mytechstartup.com).Set up AWS WorkMail and create employee emails (
alice@mytechstartup.com,bob@mytechstartup.com).Team members use WorkMail via Outlook, mobile, or web browser.
Security & Compliance: AWS ensures emails are encrypted, backed up, and protected from spam/phishing.
Benefits of AWS WorkMail
✔ Custom Domain Emails – Use professional email IDs instead of generic ones.
✔ Secure & Encrypted – Built-in security, spam filtering, and compliance support.
✔ Integrates with Outlook & Mobile – Works seamlessly with existing email clients.
✔ Easy User Management – Add/remove employees with a few clicks.
PRACTICAL : See this tutorial : https://www.youtube.com/watch?v=8Hur1zlv8as
Python Use Case in AWS Cloud
Python is widely used in AWS for automation, resource management, and application development. With Python and the Boto3 library (AWS SDK for Python), you can interact with AWS services like EC2, S3, Lambda, DynamoDB, etc.
Start and Stop EC2 Instances Using Python:
Step 1: Install Boto3
First, install Boto3 using pip if you haven’t already:
pip install boto3
Step 2: Configure AWS Credentials
Before using Boto3, you need AWS credentials. Set them up using:
aws configure
Step 3: Python Script to Start EC2 Instances
import boto3

# Create an EC2 client
client = boto3.client('ec2')

# Run instances
resp = client.run_instances(
    ImageId='ami-0672fd5b9210aa093',  # Replace with a valid AMI ID
    InstanceType='t2.micro',
    MinCount=1,
    MaxCount=2
)

# Iterate through the launched instances and print their IDs
for instance in resp['Instances']:
    print(instance['InstanceId'])
Step 4: Python Script to Stop EC2 Instances:
import boto3

# Create an EC2 client
client = boto3.client('ec2')

# Stop the specified EC2 instance
client.stop_instances(InstanceIds=['i-0dfddf53bbe19e7a5'])
IMPORTANT THEORY :
If we need to set up a data center or infrastructure on-premises, it requires significant resources like servers, firewalls, networking equipment, and storage. However, in an on-premises environment, we cannot fully automate the infrastructure setup process—we can only automate configurations (e.g., scaling servers up or down).
In contrast, cloud providers like AWS, Azure, and Google Cloud allow full automation of infrastructure deployment. For example, if we need to set up infrastructure across 100+ cloud accounts, the fastest way is to use Infrastructure as Code (IaC) tools like Terraform or AWS CloudFormation.
Terraform supports multiple cloud providers (AWS, Azure, GCP, etc.),
CloudFormation is specific to AWS.
These tools are known as Orchestration Management Tools, as they automate the creation and management of infrastructure.
Key Difference:
Orchestration Management Tools (e.g., Terraform, CloudFormation): Automate infrastructure provisioning (e.g., creating 200 EC2 instances).
Configuration Management Tools (e.g., Ansible, Puppet, Chef, SaltStack): Automate software configuration inside instances (e.g., installing Apache on 200 EC2 instances).
In summary, Orchestration tools manage infrastructure, while Configuration Management tools manage software and OS configurations.
Terraform Tutorial: Launch 2 EC2 Instances on AWS
Step 1: Install Terraform (If Not Installed)
First, install Terraform on your machine.
🔹 Run this command in Ubuntu/Linux:
sudo snap install terraform --classic
Step 2: Configure AWS Credentials
Terraform needs AWS credentials to interact with AWS.
Set up AWS CLI if you haven't already:
aws configure
Step 3: Create a Terraform Script
🔹 Create a new directory and move inside it:
mkdir terraform-ec2 && cd terraform-ec2
🔹 Create a new Terraform file:
sudo vim main.tf
🔹 Copy and paste the below Terraform script inside main.tf:
provider "aws" {
  region = "us-east-1"  # Change region if needed
}

resource "aws_instance" "my_ec2" {
  ami           = "ami-0672fd5b9210aa093"  # Replace with a valid AMI ID
  instance_type = "t2.micro"
  count         = 2  # Launch 2 instances

  tags = {
    Name = "Terraform-Instance"
  }
}
Explanation of the Code:
provider "aws"→ Specifies AWS as the cloud provider.aws_instance "my_ec2"→ Creates an EC2 instance.ami→ Amazon Machine Image ID (choose a valid AMI for your region).instance_type→ Specifies the instance type (t2.microis free-tier eligible).count = 2→ Launches 2 instances.tags→ Assigns a name to the instances.
Step 4: Initialize Terraform
Run the following command inside the terraform-ec2 directory:
terraform init
✅ This initializes Terraform and downloads required AWS plugins.
Step 5: Create an Execution Plan
Run:
terraform plan
✅ This command shows what Terraform will do before actually making changes.
Step 6: Apply Terraform Configuration (Deploy EC2 Instances)
Run:
terraform apply
It will ask for confirmation. Type yes and press Enter.
✅ This will create two EC2 instances in AWS! 🚀
Step 7: Verify in AWS Console
Go to AWS Console → EC2 Dashboard → Instances
✅ You should see two running EC2 instances! 🎉
Step 8: Destroy Resources (When No Longer Needed)
To delete the EC2 instances and free resources, run:
terraform destroy
Type yes when prompted.
✅ This will terminate both instances and clean up everything!
AWS Cloudformation:
Amazon Web Services(AWS) offers cloud formation as a service by which you can provision and manage complicated services offered by AWS by using the code. CloudFormation will help you to manage the infrastructure and the services in the form of a declarative way.
Steps To Provision EC2-instance and LAMP package Using AWS CloudFormation :
{ NOTE: A LAMP stack is a bundle of four different software technologies that developers use to build websites and web applications. LAMP is an acronym for the operating system, Linux; the web server, Apache; the database server, MySQL; and the programming language, PHP. }
Step 1: Go to the Cloudformation dashboard on the AWS management console. Click on Create the stack.
Step 2: You will be redirected to this webpage. We will be using a sample template of Lamp Stack in this. Select the option: Use a sample template. Select the Lamp Stack template. Click on View in Designer to view the design of the template.
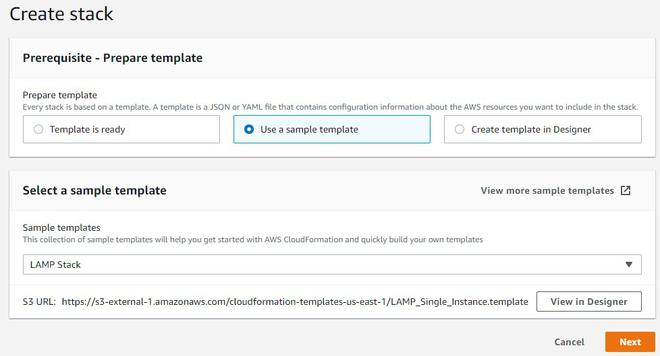
Step 3: Now you will be redirected to the designer page which shows the design of the template. It shows the instance which will be created with Apache and MySQL installed over it. It also shows the security groups attached to the security purpose of the instance. Here you can design your the infrastructure accordingly.
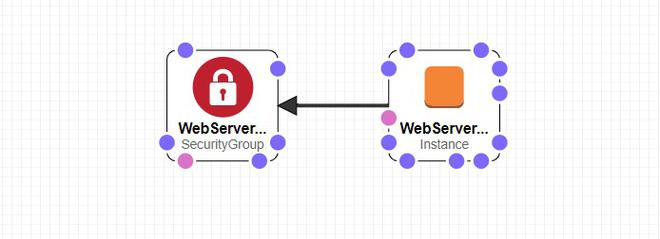
Step 4: Rename the template accordingly.

Step 5: This is the code written in JSON format which contains all the specifications and dependencies about the infrastructure to be created.
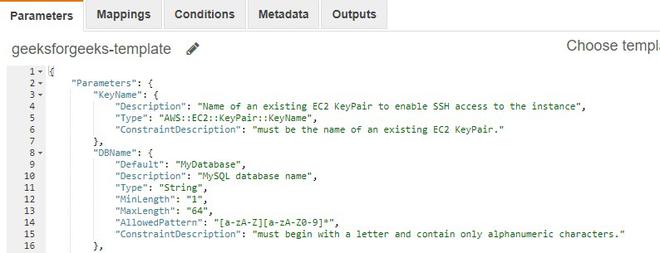
Step 6: Now click on the cloud-shaped upload button to come out of the designer.
Step 7: We will come back to the same web page. Click on Next.
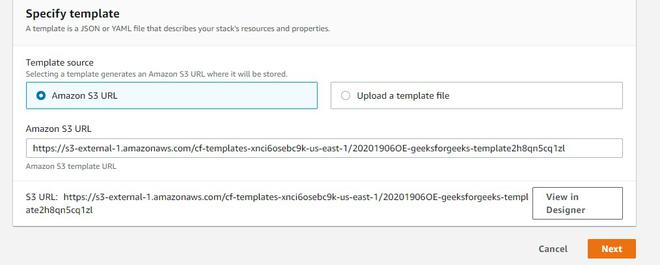
Step 8: Specify the desired stack name over here
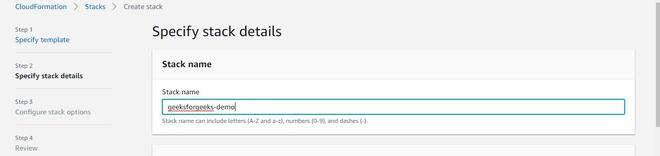
Step 9: Mention the name of the database you want to create on the MySQL database. Also, specify the password and name of the DBUser.
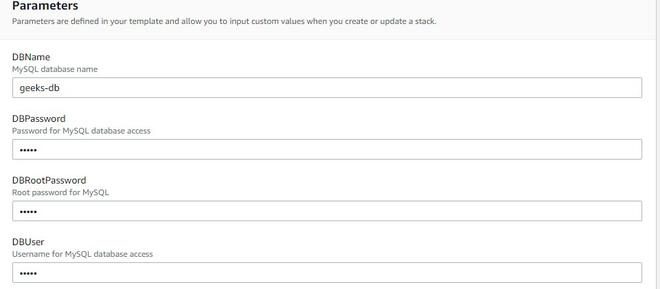
Step 10: Choose the instance type. Select any available key pair which will be used in making an SSH connection with the instance. Click on Next.
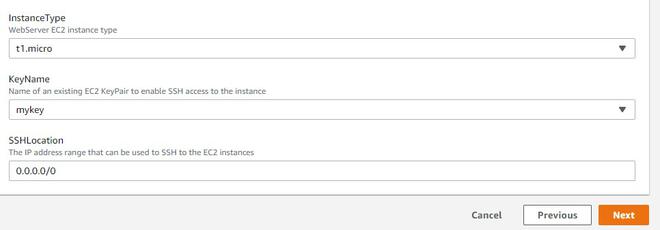
Step 11: You don’t have to worry about the advanced settings. Click on Next.
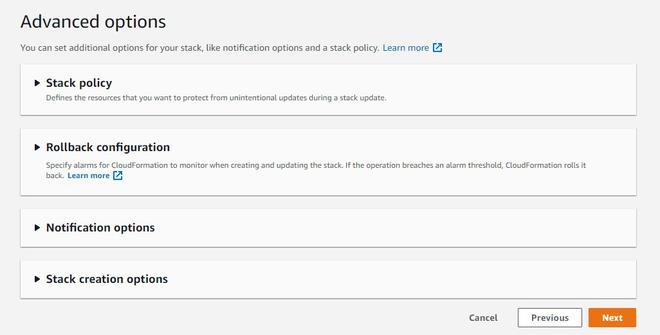
Step 12: Click on Create a stack. The instance will be created with the LAMP package installed on it. You can easily work with PHP and MySQL on the instance.
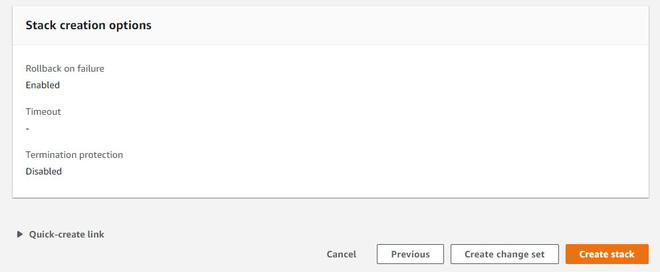
Another example: Creating an S3 bucket using CloudFormation.
s3-bucket.yaml:
AWSTemplateFormatVersion: "2010-09-09"
Description: "CloudFormation template to create an S3 bucket."

Resources:
  MyS3Bucket:
    Type: AWS::S3::Bucket
    Properties:
      BucketName: my-unique-cloudformation-bucket  # Must be globally unique
Steps to Deploy:
1️⃣ Go to AWS CloudFormation → Create Stack
2️⃣ Upload s3-bucket.yaml file
3️⃣ Click Create Stack
4️⃣ Your S3 bucket will be created automatically! 🎉
How to Delete the S3 Bucket Created via CloudFormation?
Since the S3 bucket was created using CloudFormation, deleting the stack should automatically remove the bucket. However, if the bucket has objects inside it, CloudFormation will fail to delete it. So for non-empty S3 buckets , it’s better to delete manually.
Use AWS Lambda to Start and Stop EC2 Instances:
What is AWS Lambda?
AWS Lambda is a serverless function that runs code when triggered—no servers needed!
We will use AWS Lambda to start and stop EC2 instances automatically.
What Will We Do?
We will:
✅ Create an AWS Lambda function.
✅ Use it to start and stop EC2 instances.
✅ Attach the right IAM permissions so Lambda can control EC2.
✅ Test the function manually.
Step-by-Step Tutorial
✅ Step 1: Create an IAM Role for Lambda
1️⃣ Go to AWS IAM Console → Click Roles.
2️⃣ Click Create Role → Choose AWS Service → Select Lambda.
3️⃣ Click Next → Attach "AmazonEC2FullAccess" policy.
4️⃣ Give it a name (e.g., LambdaEC2Role) → Click Create Role.
✅ Step 2: Create a Lambda Function
1️⃣ Go to AWS Lambda Console → Click Create function.
2️⃣ Choose Author from Scratch.
3️⃣ Give it a name (StartStopEC2).
4️⃣ Runtime → Choose Python 3.9.
5️⃣ Choose an existing role → Select the LambdaEC2Role from Step 1.
6️⃣ Click Create function.
✅ Step 3: Add Python Code to Start & Stop EC2
1️⃣ Scroll down to the Code section.
2️⃣ Delete the existing code and paste this Python script:
import boto3

# Replace with your EC2 instance ID
INSTANCE_ID = 'i-0dfddf53bbe19e7a5'

def lambda_handler(event, context):
    ec2 = boto3.client('ec2')

    action = event.get("action", "")

    if action == "start":
        ec2.start_instances(InstanceIds=[INSTANCE_ID])
        return f"EC2 instance {INSTANCE_ID} started!"

    elif action == "stop":
        ec2.stop_instances(InstanceIds=[INSTANCE_ID])
        return f"EC2 instance {INSTANCE_ID} stopped!"

    else:
        return "Invalid action! Use 'start' or 'stop'."
✅ What This Code Does:
It connects to EC2 using
boto3.It starts or stops an EC2 instance based on
event["action"].You must replace
INSTANCE_IDwith your EC2 instance ID.
✅ Step 4: Save and Deploy the Lambda Function
1️⃣ Click Deploy to save changes.
✅ Step 5: Test the Lambda Function
Test EC2 Start:
1️⃣ Click Test → Create a new test event.
2️⃣ Name it StartEC2.
3️⃣ Use this JSON in the test event:
{
  "action": "start"
}
4️⃣ Click Create → Click Test.
✅ Your EC2 instance should start!
Test EC2 Stop:
1️⃣ Click Test → Select StartEC2.
2️⃣ Edit JSON:
{
  "action": "stop"
}
3️⃣ Click Test.
✅ Your EC2 instance should stop!